How to use All in one seo plugin
Hey friends, are you looking for best Seo plugin?? Then you have landed on the right page, here in this blog post I am going to show you that how to install & how use all in one seo plugin step-by-step, it is an complete tutorial on how to use all in one seo plugin & improve your blog performance in search engine.
If you are using wordpress then plugins makes your work easy, you don’t need to do manually all things.
First lets discuss what is all in one seo plugin & why you should use it??
What is all in one seo plugin
Friends, all in one seo pack is a best plugin & mostly use plugin. It is a plugin which help you to improve your seo(search engine optimization) performance. The active installations of this plugin is 2+ million
Doing seo is not easy you need to consider all factors, you must use these plugins to improve your blog performance & proper seo setting for your blog can help you to bring organic traffic to your blog.
There are also some more alternative plugins which you can use like yoast seo, rankmath etc.
Why you should use this plugin
This plugin helps you to properly optimize your blog & which improves your site seo performance. To get more traffic you must do seo of your blog & this plugin covers most important settings which are necessary for seo.
Its also create your sitemap.xml file which is helpful for indexing of your blog.
This plugin is also helpful for generating robot.txt file for your website along with these it covers most important settings which improves your blog overall performance.
Now you know what is all in one seo plugin & why you should use it, lets move ahead & see how to do all in one seo settings after installing this plugin.
First step is to install the all in one seo plugin for that just follow the below given steps.
1)Login to your wordpress
2)In wordpress dashboard navigate to plugin sections & click on new plugin as shown below
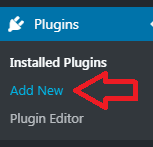
3)After that search for all in one seo pack & then you will see that plugin
4)After that click on install & then just click on activate now the plugin will be installed.
After installing plugin you can navigate plugin in your wordpress dashboard either on left section or it may visible at the top name as SEO.
Now we will do some settings, for that click on plugin & then click on general settings as shown below.
All in one seo settings
General settings

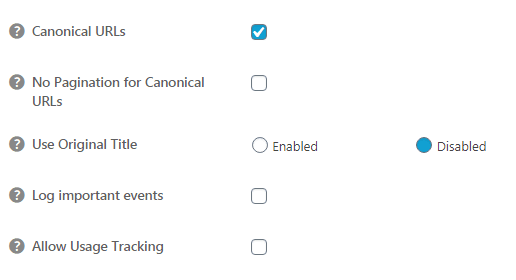
first option will be canonical & if it not checked just enable it as this setting will help you from duplicate content issues which is very necessary from seo point of view. Just enable it.
The another settings below in general setting you can do according to you.
Home page settings
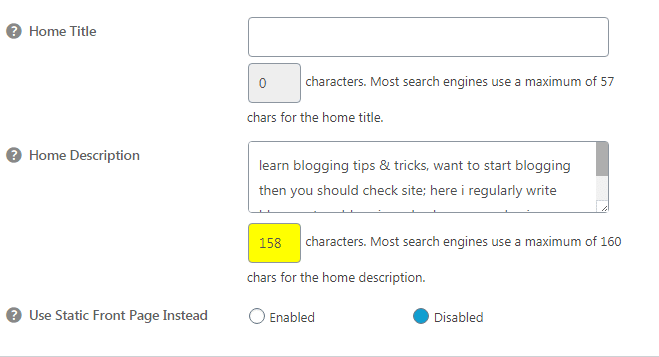
This is the most important settings as you tell search engine about your blog like its title, description etc.
You just need to enter title, description & if you are use a static page then you need to enable the use static front page setting & if you are not using the static page then just disable it as shown below. by default the static page is disable.
Title settings– leave it as it is don’t change it.
Content type settings
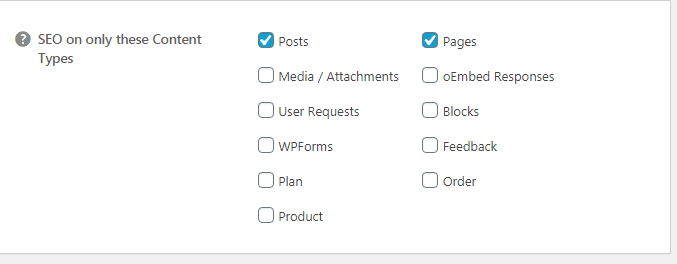
Just tick on post & pages.
Display settings
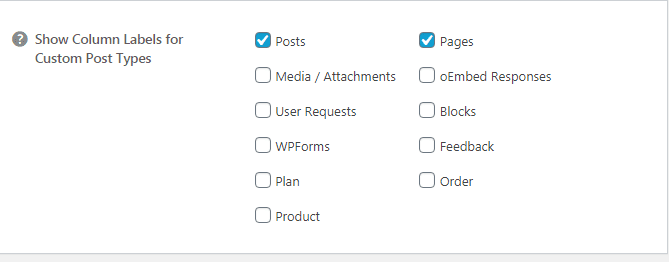
In this option also just tick on post & pages as shown below.
Webmaster verification
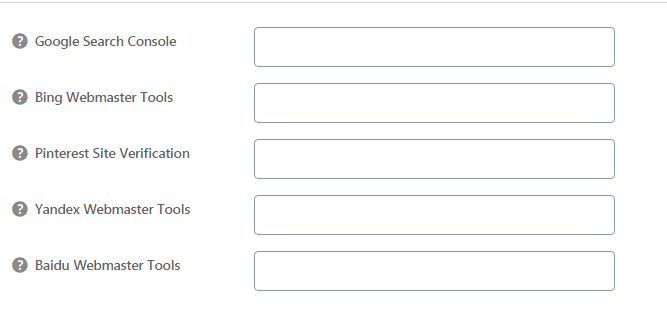
You can use this setting to verify your site on different search engines or for site verification. You can enter the verification code & can verify your site. This is a best option to verify your site. For example if you have signup for google search console then you need to verify your site they give you different options. to verify your site using html tag & you can enter it here and can verify your site easily.
Next option is Google analytics
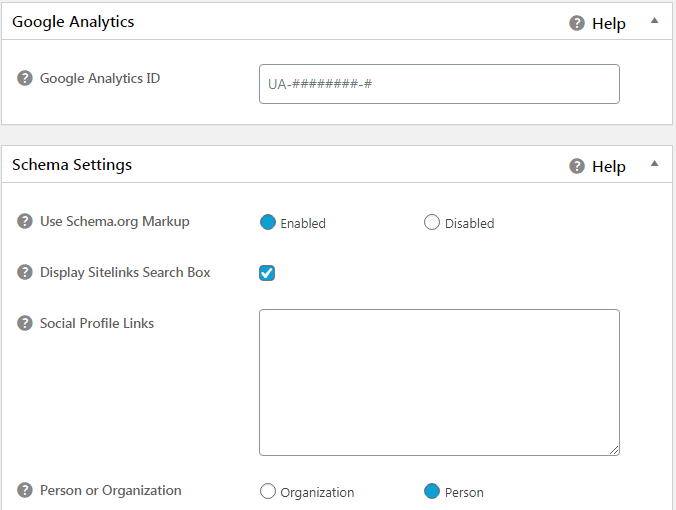
Through this option you can insert your google analytics id & can connect your site to google analytics easily. To know how to create google analytics account & connect to your site you can read more
Schema settings
This is the most important setting if it is disabled then just click on enable as shown above.
You can also enable sitelink search box
Next is social media profiles links- if you want then you can just enter your social media profile links in the box.
Other settings you can do according to your requirement
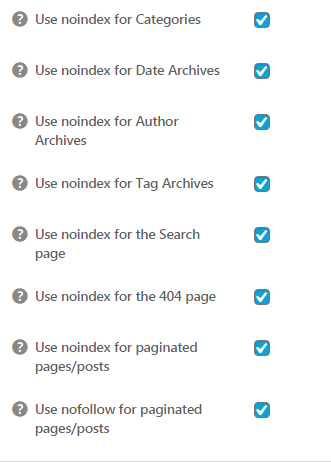
Noindex Settings
This setting is also important as you tell search engine what to index and what to not. leave it as it is.
You can see this setting below.
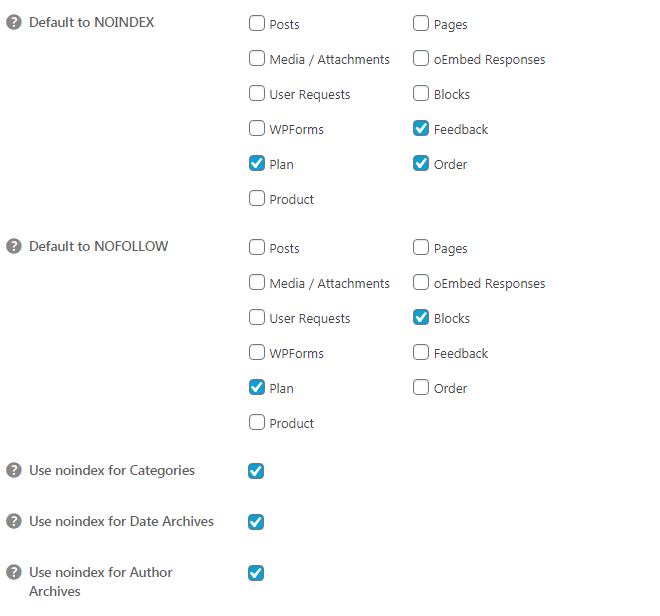
Then the others options are noindex for categories, date archieve, author archieve etc. you can do this setting according to you but I recommend you to tick on all the option as it will avoid you from duplicate content.
Rss content settings- this is a new feature of all in one seo which will prevent you from scrapers.
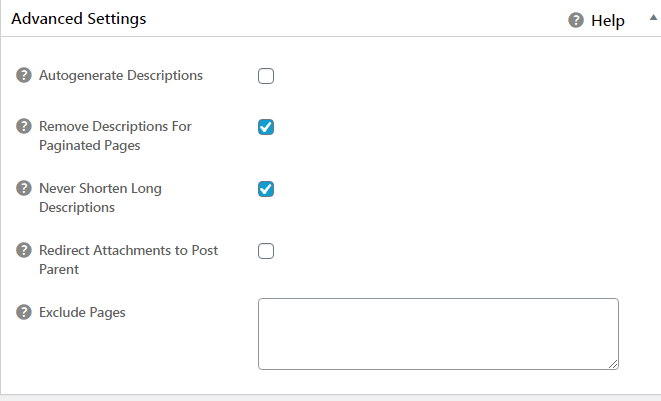
Advance settings– this settings you can do it by yourself according to your need.
Keywords
Nowadays google not take consideration on meta keywords but you can use meta keywords for that just enable it if you want to use meta keywords as shown below.

After doing all the above settings just click on update options & your all settings will be save.
After doing general settings just go back & there is an feature manager option just click on it as shown below.
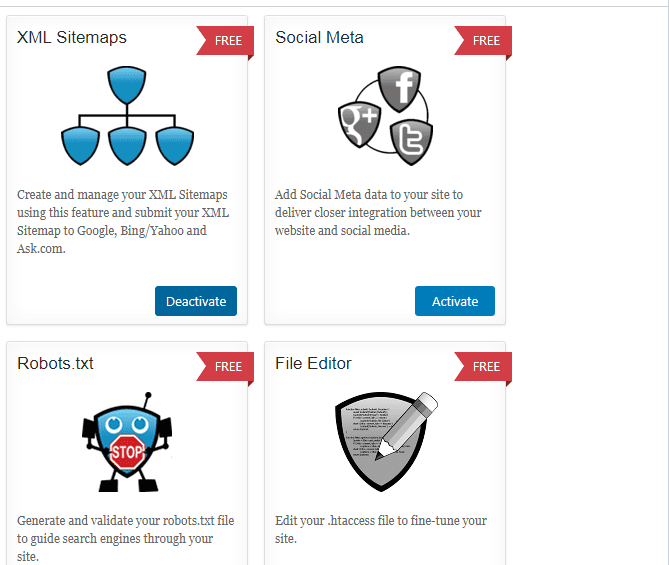
In this you can enbable various options you can create sitemap.xml file for free, you can create robot.txt file for your blog & many more. To use some more options of this plugin you can also upgrade.
the above are some most important settings which you need to do after installing plugin, this all settings will improve your site seo.
So friends I hope that this information had helped you to know about how to use all in one seo plugin, if you loved the content then you can also share it with others.
