How To Make A WordPress Blog In 2022 Step-By-Step Guide For Beginners)
Hey, are you thinking to start a WordPress blog?? Then this blog post is for you. In this blog post, I will share each & everything that is required to build a WordPress website from scratch. It is a complete step-by-step tutorial on how to start a blog in 2022, about how to buy hosting, how to buy a domain, how to connect domain & hosting, how to install WordPress & a lot more. Using WordPress you can create any type of website. It may be a blogging website, e-commerce website, Q& A website, etc.
This blog post contain some affiliate links, means if you buy any product or service through this links then i will receive a small commission at no extra cost to you. which help us to maintain this website. remember that i will always share products or services that i have personally used & which will be helpful to you.
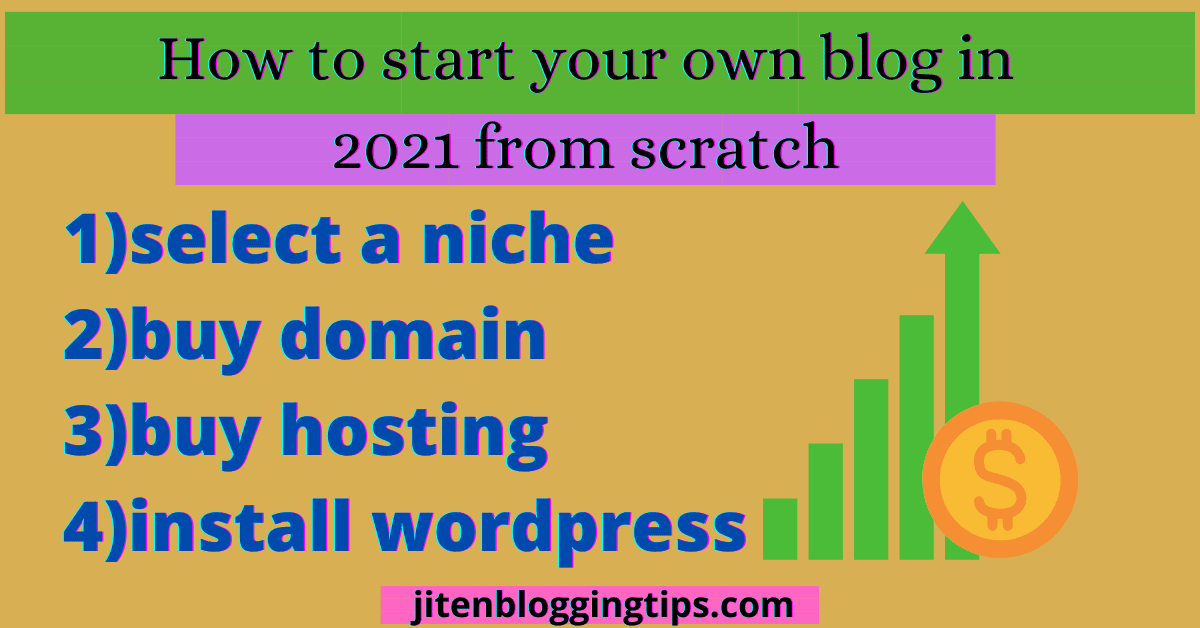
First, let’s see what is required to create a self-hosted blog
- A domain name(web address)
- Hosting(space)
- Blogging platform(wordpress)
But the question is why do you want to create a wordpress blog?? There may be a lot of reasons for creating your own blog. Some want to create a blog to earn money, some want to share their knowledge and experience in a particular field or some want to build their personal brand. The reason may be anything but I guarantee you that at the end of this blog post you will be able to create your own professional-looking self hosted wordpress blog.
If you get stuck in any steps then you can directly contact me through the contact form which I have provided in this blog and I will be happy to help you.
So are you ready! Then let’s start
Why WordPress??
friends, here I am talking about a self-hosted WordPress platform which is free software and it is based on CMS(content management system) which now powers 39.5% of all the websites on the internet, The reason is simple you don’t require any coding or HTML knowledge to build a website using WordPress. Even before you have never created a website this blog post will help you; I will walk you through the whole process of creating a wordpress blog website from A-Z.
Many people create their websites using WordPress, friends here I am not talking about wordpress.com.I am talking about wordpress.org which is free software. Through WordPress, you can fully customize your website according to you.
You can add more functionality to your blog as compared to other blogging platforms. There is also free blogging platform but I don’t recommend it to you because free blogging platform has limitations, you don’t own your blog & you cannot fully customize your blog. if you are really serious about blogging and want to earn passive income from your blog then you must go with self-hosted WordPress, if you are a beginner then don’t worry in this blog post I have explained each step in a very easy & simple way.
WordPress has lots of plugins which makes your work easy. As you can easily add functionality to your blog without any coding. WordPress is Buildup on PHP & MySQL & you don’t require coding knowledge to build a website using WordPress.
I hope now you know why you should build a website using WordPress.
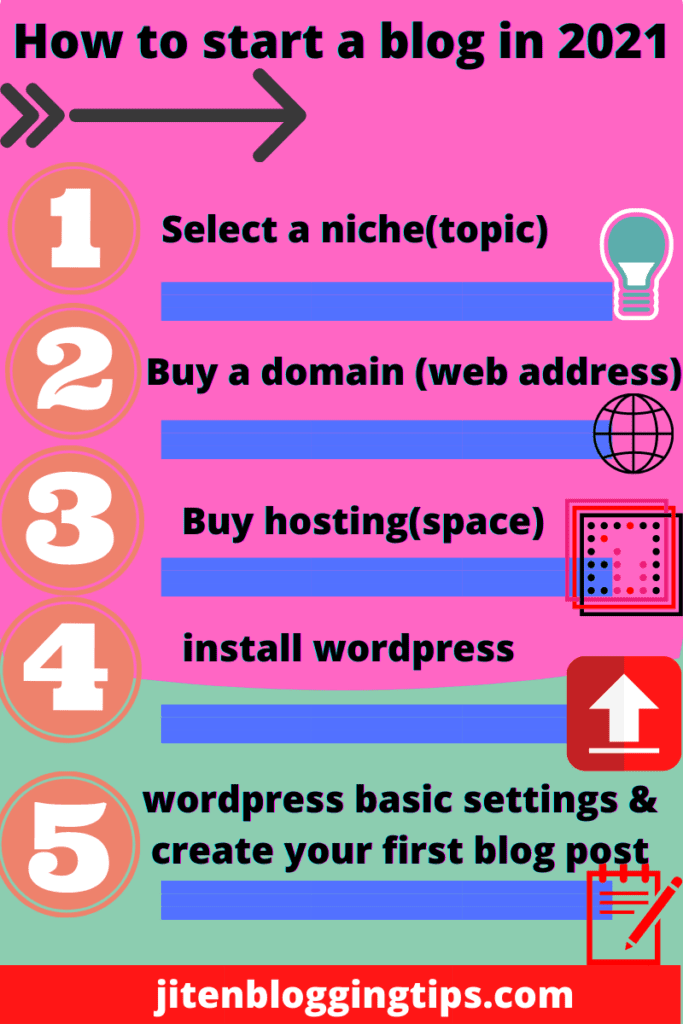
How to start a blog in 2022
What is niche??
It is the very first step, as before starting a blog you have to decide on a niche.
Friends before starting blogging you need to decide on a particular niche. But wait! What is niche?? Niche is nothing but just a topic. You can start a blog on any topic based on your knowledge and experience.
According to me, you should select a niche in which you have good knowledge, and on which you can write more & more. Because if you will select a topic in which you don’t have any knowledge then you will get stuck, and after some time you will end up & you will think what to write next. So it is better to go with a topic in which you have good knowledge.
Your content should be such that it will help others & which adds value to people’s life.
Still, if you are having difficulty in finding a niche then you must read 10 profitable niche ideas.
After deciding a niche next step is to buy a domain name, So let’s see how you can buy a domain.

How to buy a domain??
The domain is your blog address, for example, my blog address is jitenbloggingtips.com.
Below are some points which you should keep in mind before buying a domain name.
- Choose a short and clear domain name which people can remember easily.
- Choose a domain name relevant to your content which you are going to write on your blog. For example: my niche is related to blogging so I have named my domain jitenbloggingtips.com & which is relevant to my content.
- Don’t use any brand name while selecting a domain name. As it can put you in trouble.
- Don’t use hyphens, don’t give a space between words, don’t use -,” or such type of symbols.
How to know a domain is available or not??
There are some free tools available which you can use and can check whether that domain name is available or not. But I will tell you a website through which you can buy the domain name at the cheapest price; I personally use this website to register the domain name.
Note: there are some hosting providers which offer a free domain name for 1 year with their hosting, but I recommend you to buy a domain from a different website & hosting from another, I am telling this to you because after 1 year you have to renew that domain & the price may be higher so why not to buy a domain from another website which price is cheapest & the renewal cost is also not so high.
Here we are going to buy a domain name from namecheap.com which is a very popular website for domain registration & cheap prices.
Do You know the best thing about Namecheap is that its renewal price is not high & it also gives you free domain privacy; which means your personal information is hidden & benefit of it is that you will not receive any spam messages or fake calls from anyone. other hosting or domain register also provided but you need to pay for domain privacy. That’s why I recommend you to buy a domain name from NameCheap.
You can buy any type of domain extension like .com, .in, .co.in, .online, etc. as per your requirement, but I suggest you to go for .com domain only as it is a top-level domain.
Follow the below-given steps to buy your own domain
Step1) go to namecheap
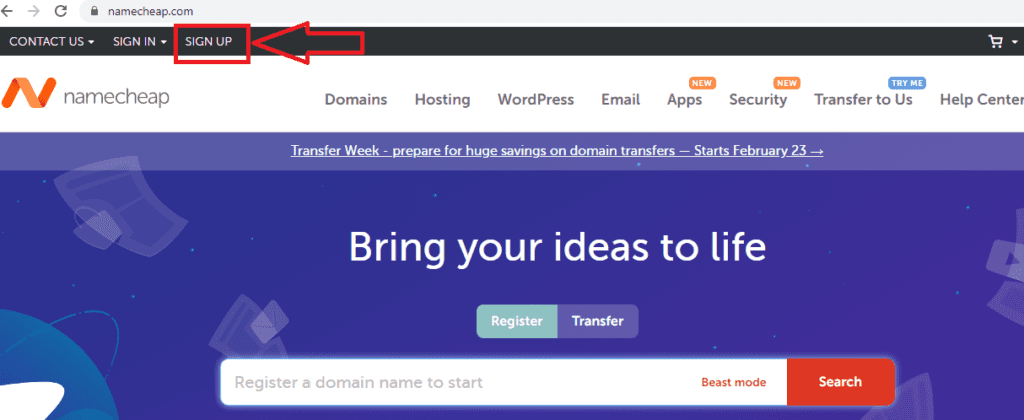
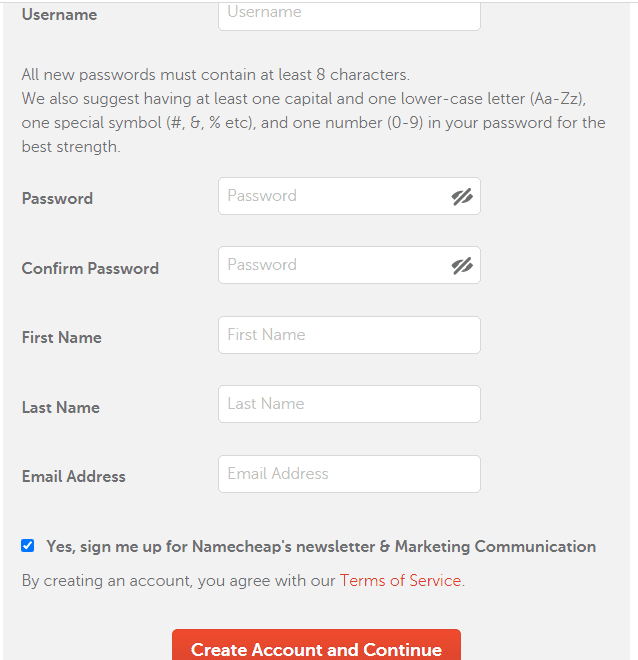
Step2) first step is to signup. You need to just click on signup & fill in the basics details username, passwords, first name, last name, e-mail, etc. & click on create an account and continue as shown below.
Step3) Now just type the domain name which you want & click on search as shown below in the figure. Note: you need to enter your domain name which you want for example example.com or any domain you want to but like the example.in, example.co.in, etc. I recommend you to buy the .com domain as it is the top-level domain and is used globally.
it is not necessary that the domain you are searching for will be available. if it is not available then try another domain name with some little variation.

& then click on add to cart

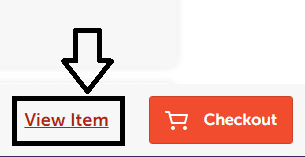
click on view item
click on checkout
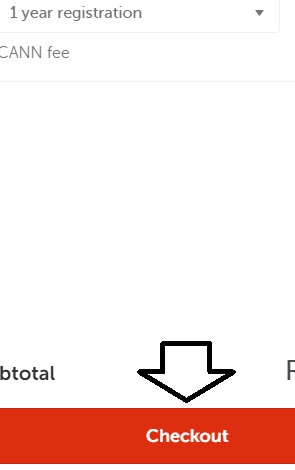
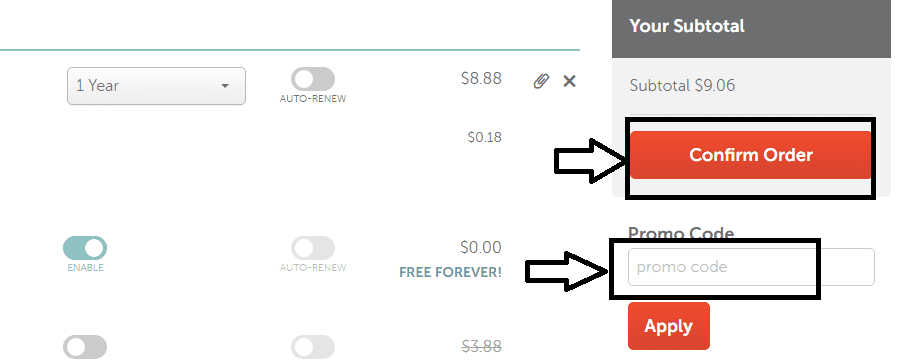
you can also add other items to the cart but it is not necessary, you can buy it later & just click on confirm order as shown below in the figure. to get more discounts you can use a namecheap promo code then you can apply it & just click on confirm.
Note: if domain privacy is disabled just enable it as it is free and your personal information on whois will be hidden & you will not receive any spam & disturbance call & message.
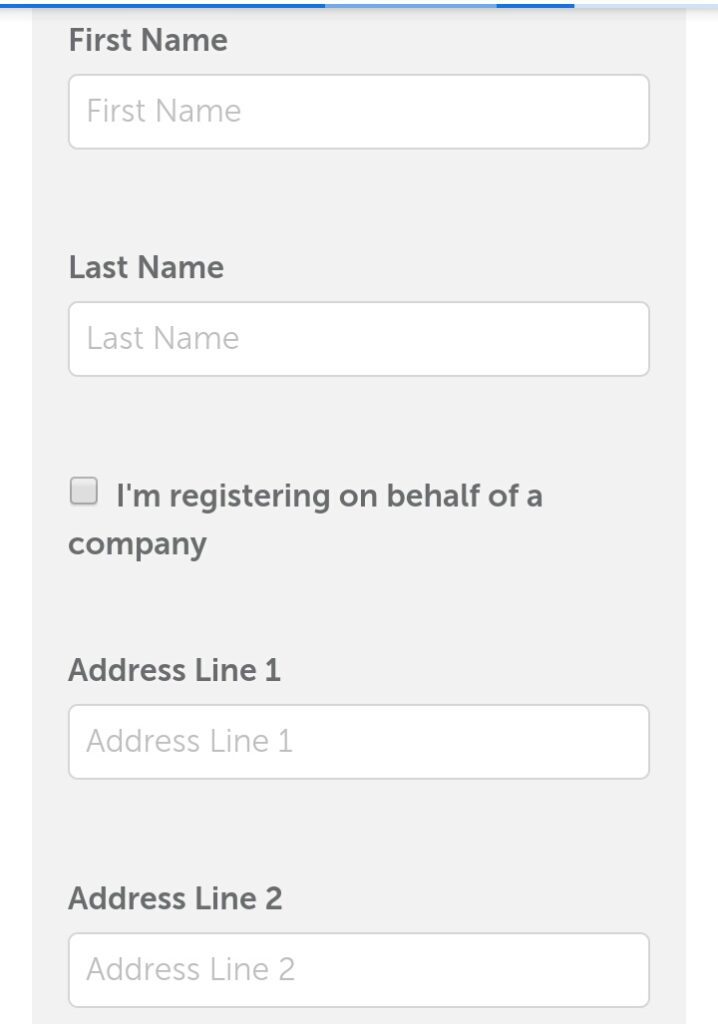
Step4) now you need to enter your basic information like address, name, card details as shown below(note: you need to enter the credit card or debit card details which are globally accepted if you don’t have your own credit card then you can use your parent’s credit card for purchasing the domain) just fill other details like address, card details & just complete the payment.
enter your first name, last name, address.
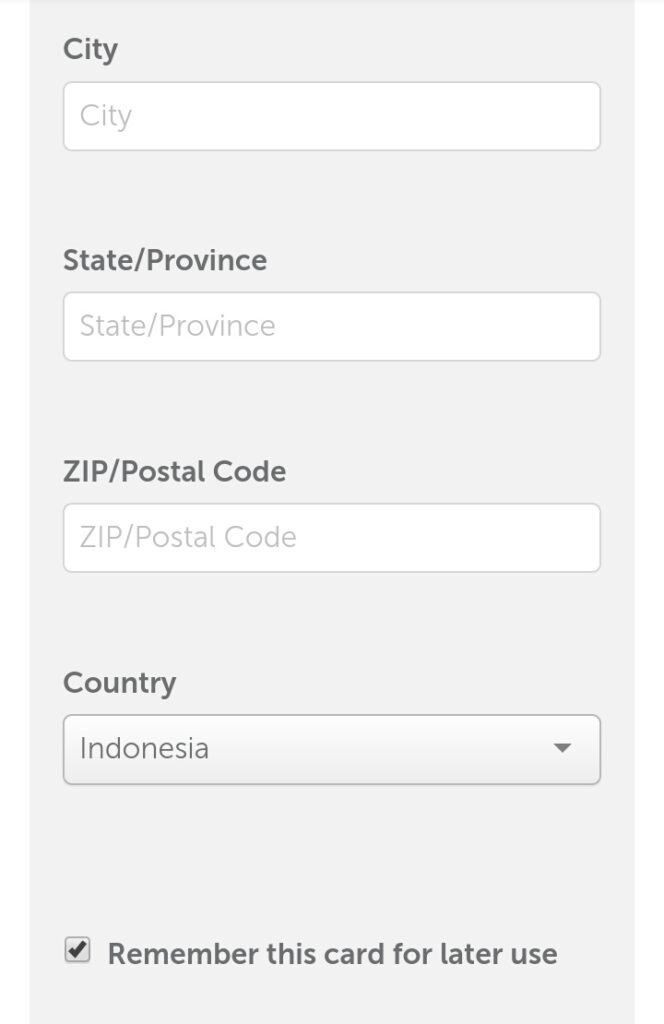
then enter city, state Pincode, select country, card details.
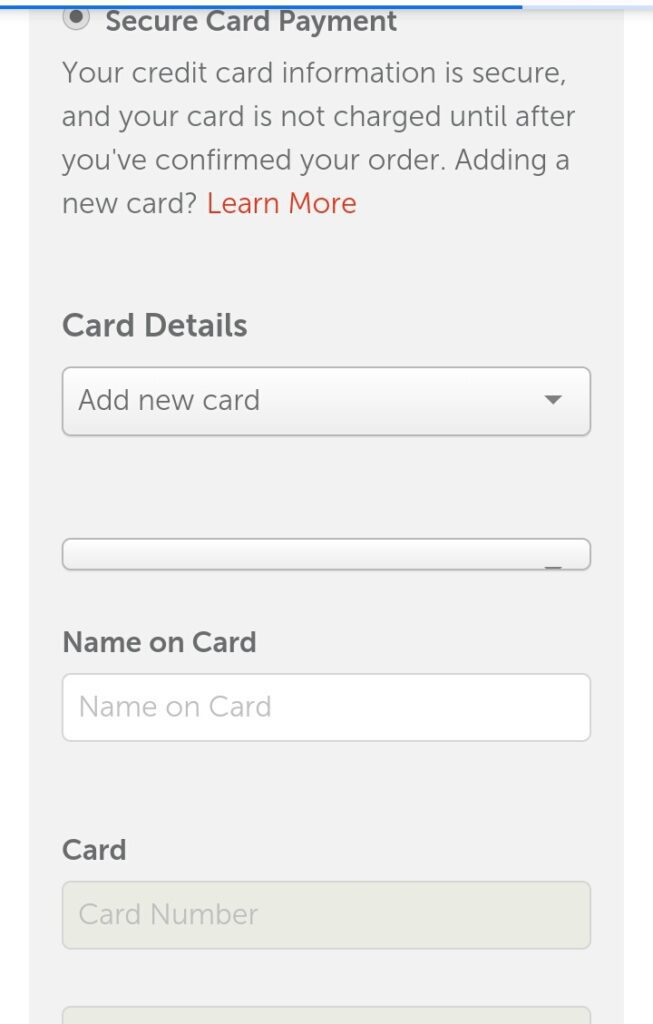
& at last, a confirmation message will come.

Congratulation! you have now purchased the domain.
After that, you can log in to your Namecheap account and can manage your domain. Now our work to purchase a domain is over, the next step is to buy hosting, let’s see how to buy it step-by-step.

How to buy hosting
Friends here I am going to show you how to buy hosting from Bluehost. Bluehost is best-hosting provider in the market & WordPress itself recommend to use bluehost hosting as they have very good customer support if you are stuck anywhere.
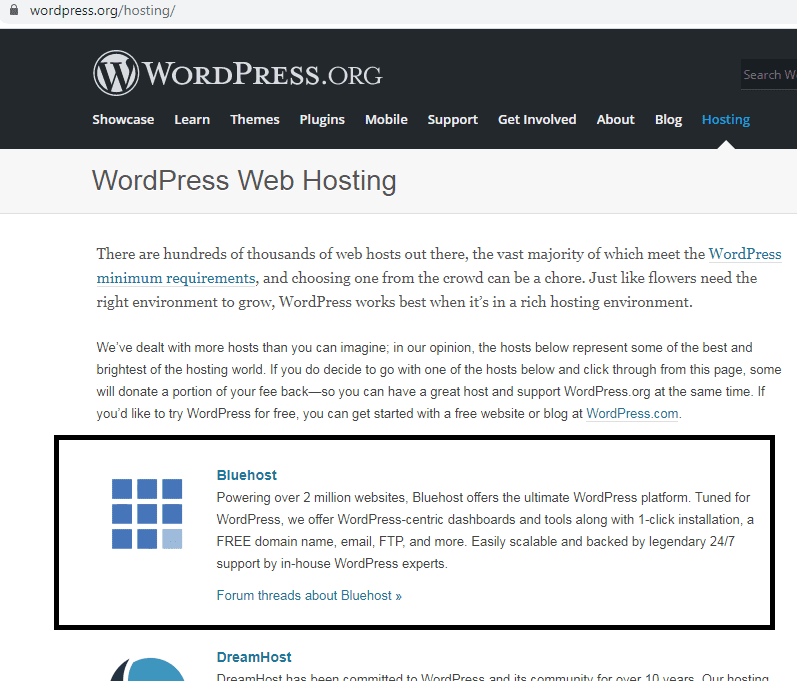
They have 24/7 hours customer support available. My experience with Bluehost is very good, as if I got stuck anywhere they are always there to help & I love their chat support. They solve any kind of problem with one interaction. That’s why I will recommend you to buy hosting from Bluehost.
Friends, there are various hosting plans available. You can select anyone which is more suitable for you.
If you are a beginner then just go with the shared hosting basic plan. To save more money you can choose 36-month plan which is for 3 years and it is good for beginners who only have 1 website.
Below are steps to buy hosting from Bluehost.
- Go to bluehost

- click on get started as shown above and from here you can select the hosting as per your requirement. But if you are just starting then go with shared hosting basic plan.
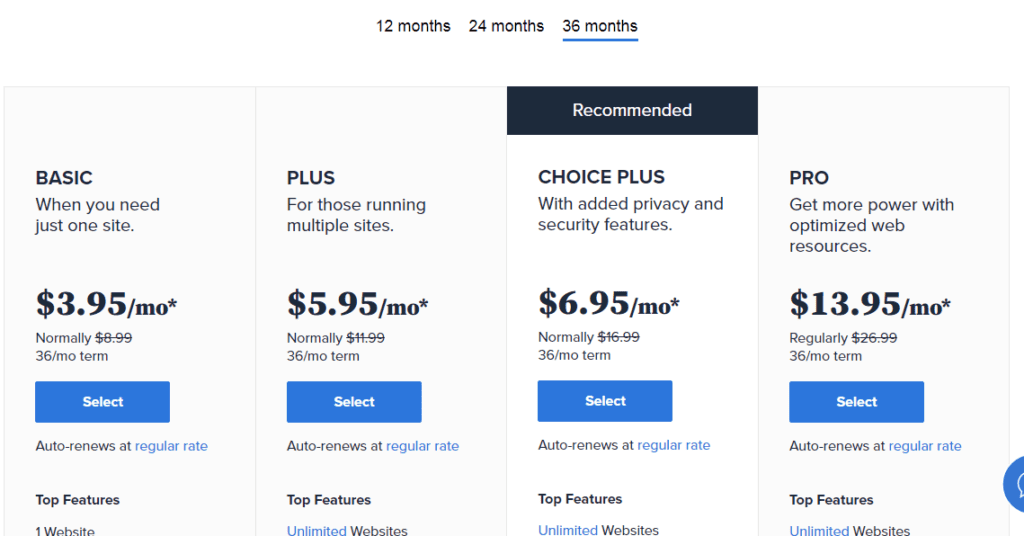
2. Then click on select option as shown above.
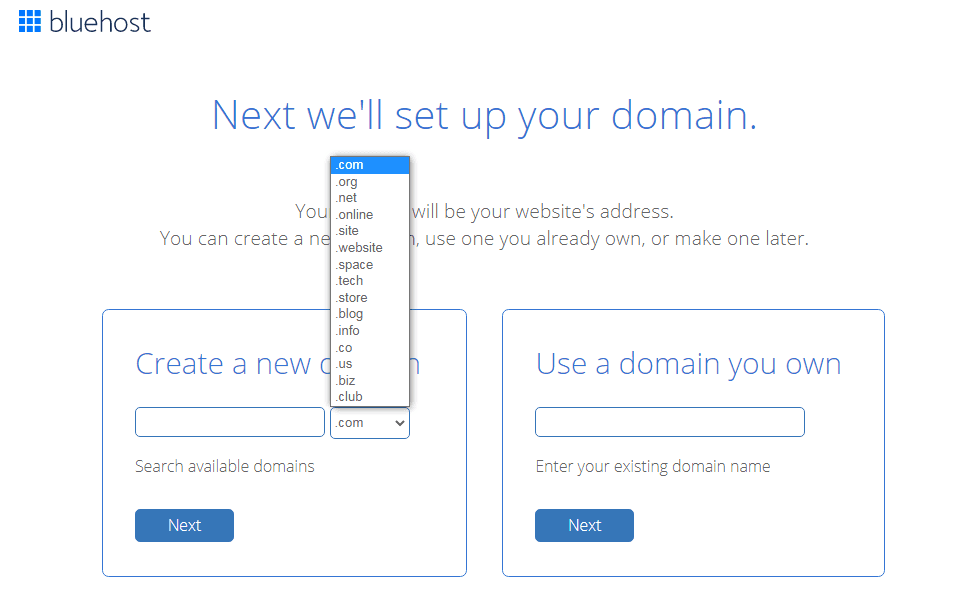
3. Then there will be an option to add a domain name, if you want to get a free domain for 1 year then you can search for that domain just enter the domain name which you want to register in a box showing search available domain.
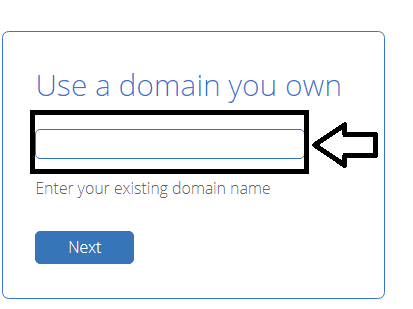
If you have already purchased the domain then we need to put it in a box which is showing enter your existing domain name as shown in figure (Note: in this tutorial, we are going to put the domain which we have purchased from Namecheap)
4. After entering the domain name which you have registered on Namecheap just click on next
5. Now you need to add basic details like your name, address, phone no. after filling this information,to get more discount just move your mouse courser to the upper side & and a popup will come just click on the claim saving and enter all details.
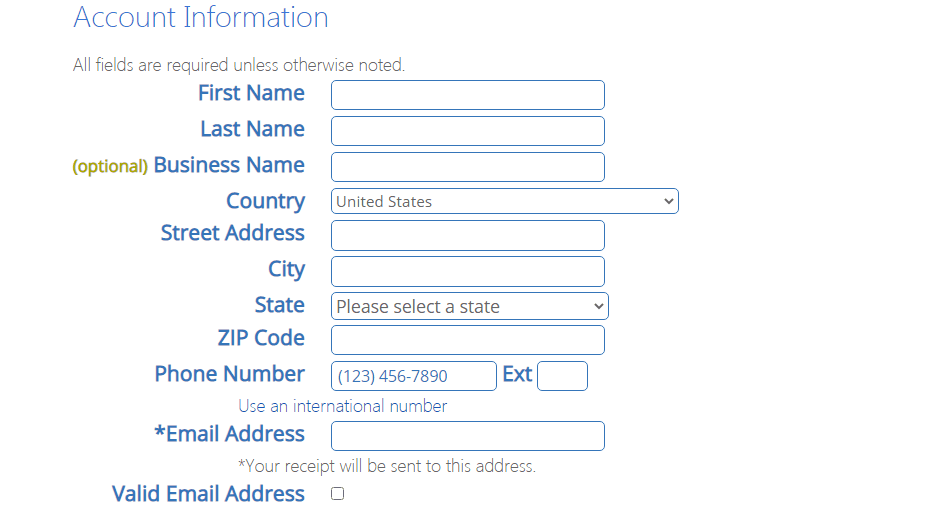
then there is also package information like an account plan, to save more money you can go for a 36-month plan. you will also get a free SSL certificate that is HTTPS secure connection.

then there are also packaging extras. just untick all the other products as it will increase the total amount. you can also purchase it later if you want.
6. next step is to enter further card details (note: you need a credit card to do payment for hosting) just enter all details & complete your purchase. As shown below in the figure.
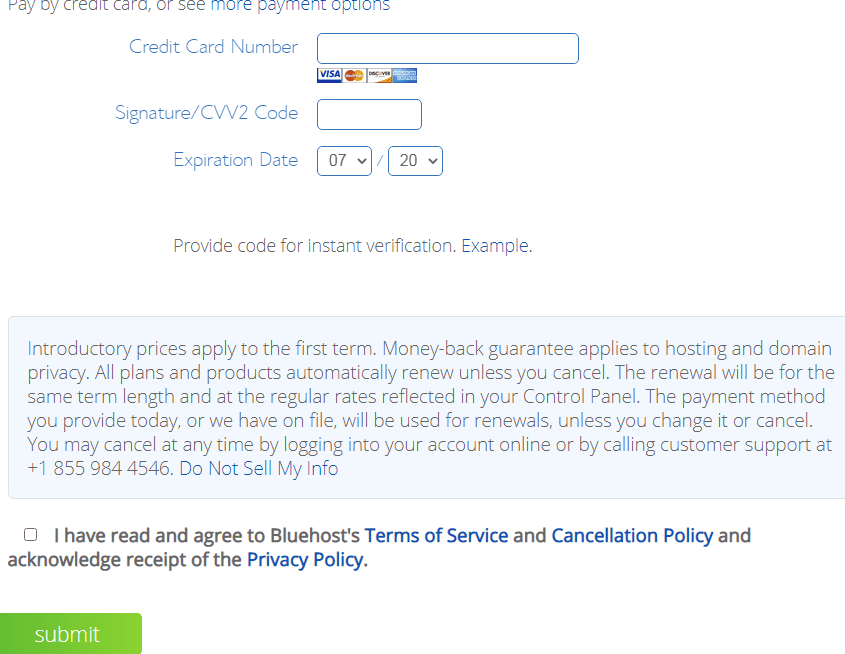
Bluehost has now made the process simple for installing WordPress just follow the below-given steps.
Installing WordPress
7) After entering details you will receive a confirmation mail by Bluehost on your email which you have used while purchasing process. & after that on that page just click on create an account as shown below.
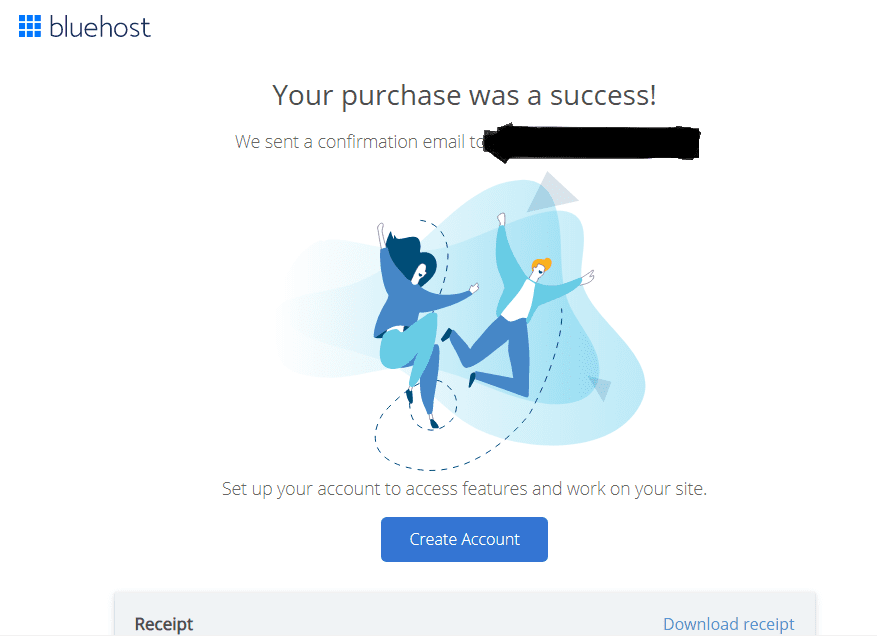
8) Create an account by entering your domain name for example : example.com & passwords, retype the password, and click on create account.
The next step is to log in. Just log in by entering your domain name & password. note: remember the username & password or note it somewhere else.
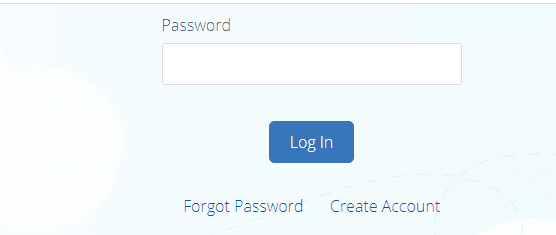
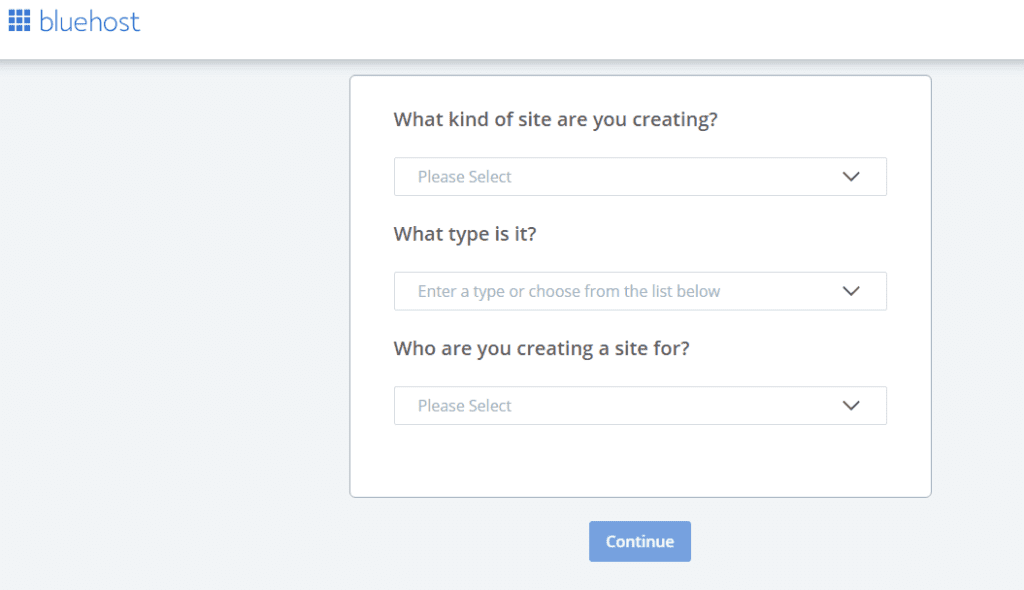
9) after that you need to select some options for your website like what kind of site to create, type of website, from whom you are creating the site just fill all the details according to you & click on continue as shown below.
10) then select another option like what you want to create. note: here we are creating a blog so we will select a blog option. you can also select multiple as per your requirement or just click on skip this step.
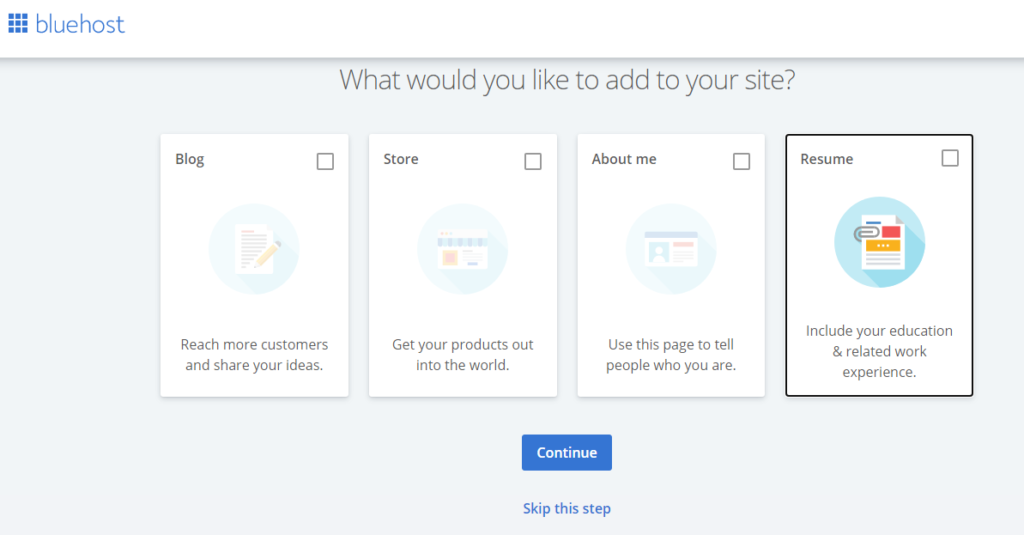
there will be other steps like site title name, tagline, etc, or just skip steps.
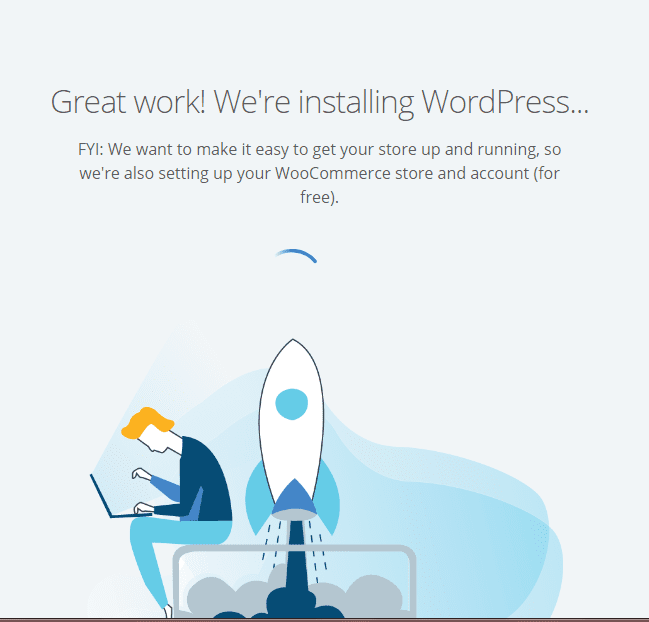
now the WordPress will start installing as shown below. note: it may take some time to install WordPress so keep patience & don’t close that page & after that you will be redirected to the Bluehost account dashboard.
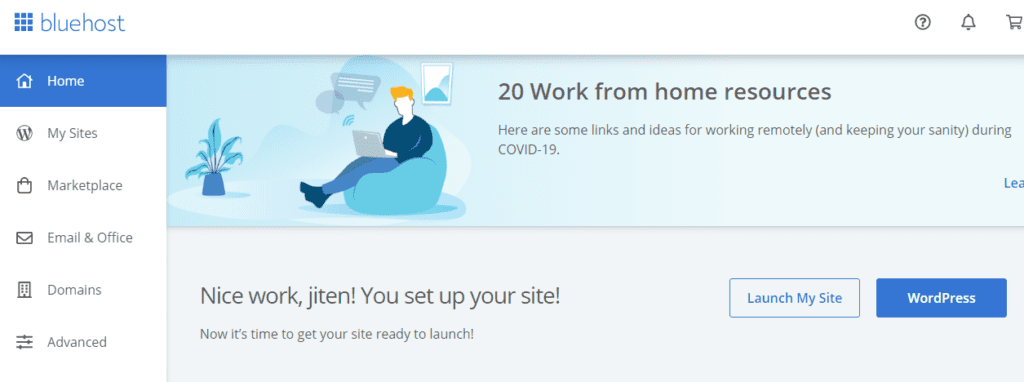
Now you will be taken to the Bluehost account dashboard as shown below in the figure.
now our next step is to connect the domain name that we have purchased from Namecheap with Bluehost hosting. Follow the below-given steps to know how to connect the domain with hosting.
How to connect your domain with hosting??
In the Bluehost account dashboard, you need to assign your domain name for that just follow the below given steps.
Go to domain section>assign> there just type your domain name & click on assign this domain as shown below in the figure.

if you have purchased a basic hosting plan then you would not be able to use addon & let it be parked domain as shown below & just click on assign this domain
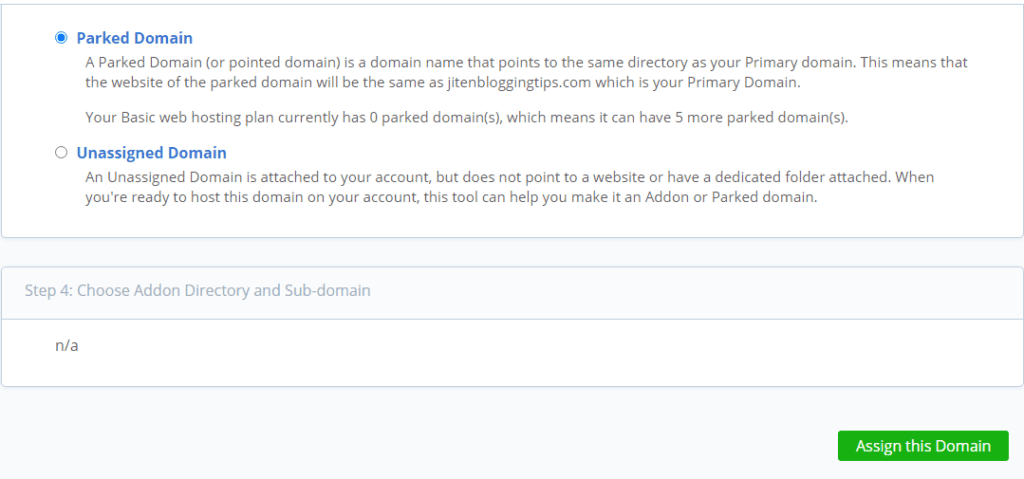
now let’s see how to connect the domain with hosting
To connect domain with hosting first on the Bluehost account dashboard go to domain section>my domains>manage>DNS.

there you will find 2 nameservers that is ns1.bluehost.com & ns2.bluehost.com just copy those two nameservers & you need to paste them in DNS(domain name setting) from where you have purchased the domain name.
we need to just go to Namecheap & have to log in.
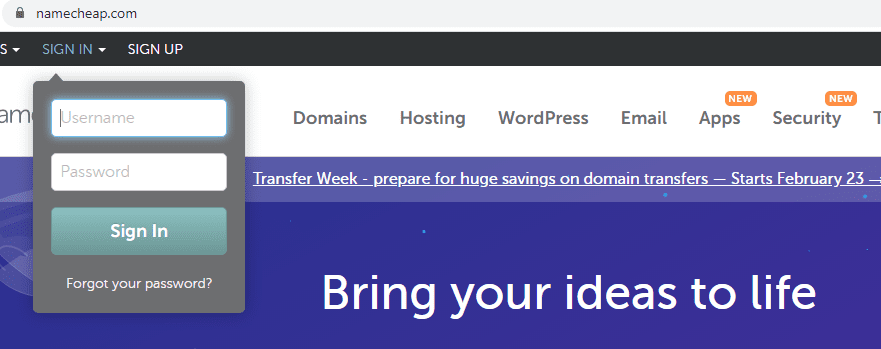
After that click on domain lists,>click on manage just beside the domain
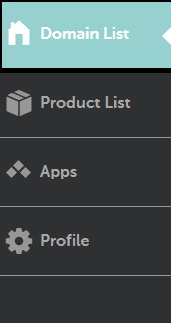
There will be NAMESERVERS Option>select custom DNS and just paste those two nameservers which you have copied from Bluehost & shown below
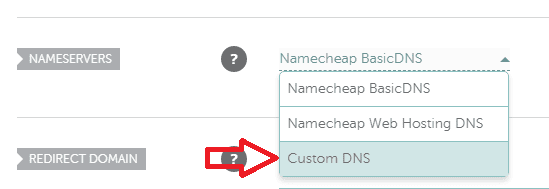
> now just click on the blue tick sign and your nameserver will be saved. it generally takes 15-20 minutes to connect the domain with hosting but Note: it may take 48 hours also to properly connect your domain with hosting so don’t panic & keep patience).

After doing this step now let’s move ahead & see how to launch your blog and log in to the WordPress dashboard.
How launch your Blog
Now you need to launch your WordPress site for that go to the home section in the Bluehost dashboard & there you can see the launch my site option as shown below. Just click on launch my site & a popup will come saying that launch anyway click on it. note: It can take some time to process & further you will be redirected to your WordPress dashboard.
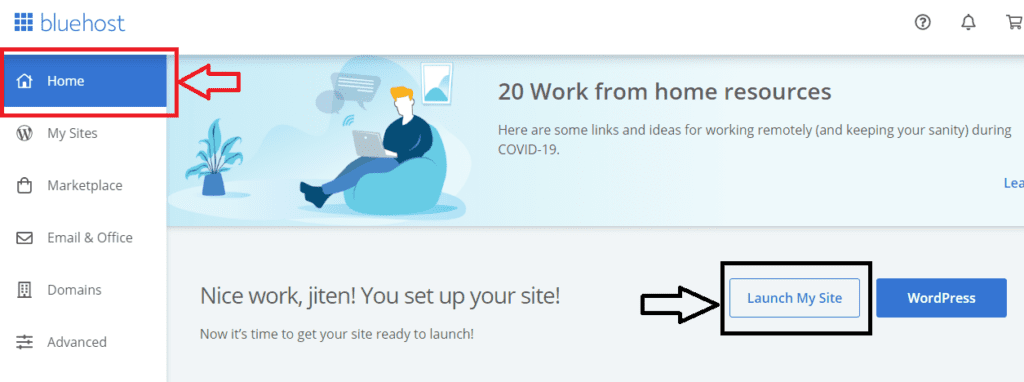
You can also check your email for the username & password of your WordPress account send by the Bluehost.
below is the WordPress dashboard. now from here, you can manage your blog.
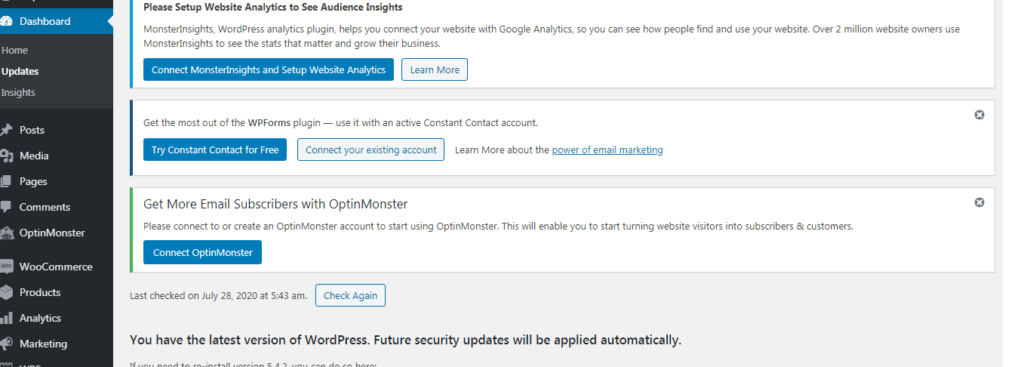
Note: to login to your WordPress dashboard you can also go to browser & just enter your site name & at the end just add wp-admin and then you can log in to WordPress dashboard.
Ex: yoursite.com/wp-admin
Hurry! We have done it.
congratulation!! you have created your own blogging website
Now you can check whether your site is working or not. For that just go to Google and type your domain for example: example.com & if it not opening properly or showing some error then don’t get panic as it takes time for the whole process to complete just keep patience & try after some time again.
Now we have created our blogging website & it’s time to do some basic settings for that just follow given below steps.
If you are looking for quality hosting at the cheapest price then you can click here
If you want to learn WordPress from scratch practically then you must Enroll in my 100% practical free WordPress video course
Basics WordPress settings
On WordPress dashboard Go to settings>general.
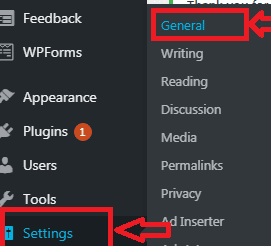
here you need to put your website basic information’s like site title, tagline, etc & just click on save button.

The next section which is important is permalink go to settings>permalinks & here you need to set a permalink for your blog there are various types of permalink but I recommend you to use post name which is good from SEO point of view also. It will be as yourblog.com/sample-post.
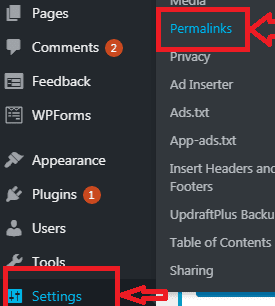
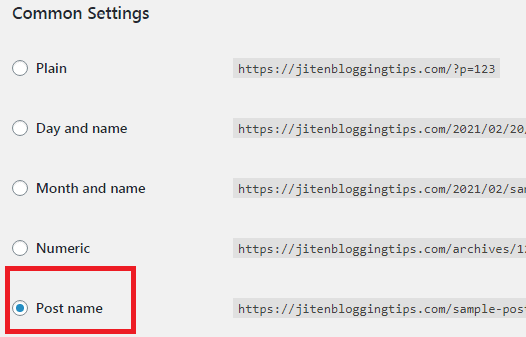
These was the 2 most important settings which you need to do after installing WordPress.
Installing theme
There are lots of free themes available which you can use for your blog but you must go with a good theme that will make your blog design better. Below are some themes which are good and SEO(search engine optimization) friendly theme.
- Generate press
- Neve
- Astra
- Point
- Vilva
- Ultra
The above themes are responsive & SEO friendly themes.
Now let’s see how to install a theme step by step.
- Go to appearance > themes.
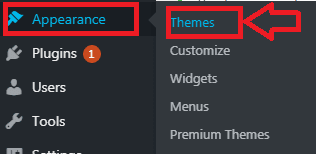
Click on the add new big box> there search for the theme which you want to use and select the theme which you want to use & you just need to click on install >activate.
This way you can install a theme for your blog.
How to write a blog post
before writing your first blog post you need to keep some points in mind as your first blog post must be impressive & for that, you need to write content that will help your audience & which will add value to people’s life. If you are just writing your first blog post then you must read how to write your first blog post.
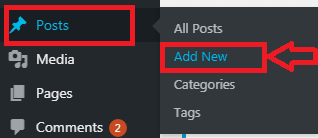
Friends creating a blog post is very easy just go to the post section in the WordPress dashboard as shown below in the figure & you need to just click on add new.
Posts>add new. After that, you can just start writing your first blog post.
How to install plugins
plugins make your work easy & there are dozens of plugins available in the WordPress library which you can use to add functionality to your blog & can make your blog professional.
But using lots of plugins on your website may decrease your website speed & performance so you must choose good & most important plugins.
For Seo(search engine optimization) of your blog, you can use SEO plugins like Yoast SEO, all in one SEO plugin, rank math, etc. if you want to know how to do SEO you can also read on-page & off-page SEO.
Installing a plugin is easy just go to plugins>add new & now you can search for any plugin and just you need to click on install now> activate.

Some more important things
Friend’s WordPress is best as you can fully customize your blog & can design it according to you. But while using WordPress you need to keep some points in mind. The security of your WordPress website totally depends on you.
You need to keep eye on updating plugins, themes, and sites from time to time & you must not use any plugin which you don’t know as it can put you in trouble.
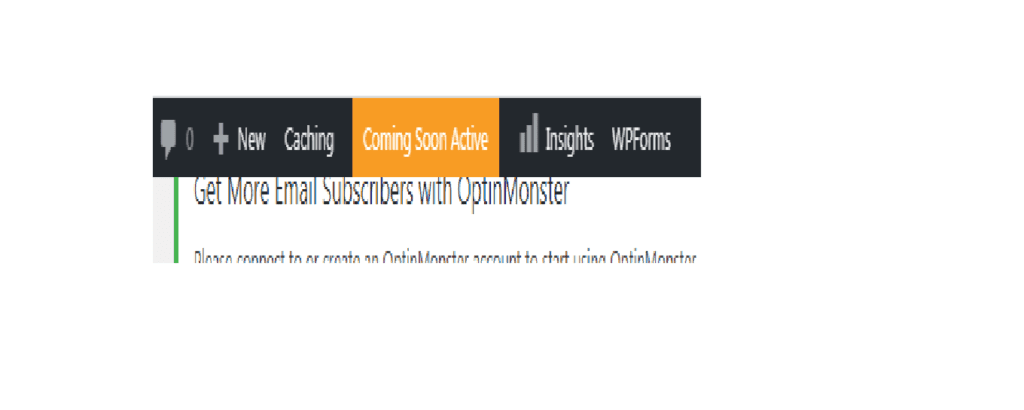
Note: by default Bluehost has set your website on the coming soon page to bring your website to live just click on coming soon activate & then your website will be live as shown below.
Below are some plugins which are most important for your website.
- Updraft plus (free plugin) – for backup
- W3 total cache- for clearing your website cache.
- Seo plugin (free plugin) – for seo of your blog
- Clouldflare- for security & performance
- Jetpack- for more features & security
- Akismet – for protecting your site from spam comments.
- Wp form- for creating forms for your blog
And along with this, there are lots of other plugins which you can use & can make your website performance better.
So, friends, we are at the end of this blog post & I hope this blog post had helped you to know about How to create a blog in WordPress from scratch.
keep visiting our site, as I regularly write content on blogging, WordPress, blogger & earning tips that will help you to take your blog to the next level
Conclusion- creating your own blog helps you to build your personal brand & you have full control over your content. I have covered all the process of creating a blog from scratch in this blog post & I hope it had helped you. If you think this blog post is valuable & can help other than show some love by sharing it with others.
If you have any queries or questions related to this blog post then you can ask in the comment box.
Happy blogging…
FAQ- frequently asked questions
How do bloggers earn money??
There are different ways to make money from your blog. the two common way to earn from your blog is through google AdSense & affiliate marketing.
Which topic is best for blogging??
You can start blogging in any niche but I recommend you to select such a topic on which you have good knowledge & on which you can write more & more.
How to find a topic for a blog post??
There are various ways to find ideas for your blog post to know you can read more..
Does it cost money to start a blog??
If you want to create a professional blog then you need some investment to start a blog.
