How To Buy Hosting From Hostinger 2022| Complete process
If you are thinking to start your own professional blog or website at the cheapest price then you must read this guide till the end because in this blog post I am going to show you the exact process of how to buy quality hosting and set up your blog or website step-by-step & for that, we are going to use Hostinger which is one of the best & affordable Hosting for beginners. So this is going to be a complete tutorial on how to buy hosting from Hostinger in 2022 & how to install WordPress easily.
Before we move to the main point of this article first let’s see a short history & features of this hosting company
What is Hostinger :
If you are not aware of Hostinger then let me tell you first about it. Friends, Hostinger is one of the best hosting available in the market at an affordable price with lots of features and good support that is required to build a professional blog or website.
Hostinger started in 2004 & it was named As Hosting media. With time this hosting company grew up very fast & now it is a well-recognized hosting company in the market that offers you a hosting plan, domains, SSL & lots of features at the cheapest price & it is a plus point of this hosting company.
Many hosting companies are there in the market but their hosting plans are costlier & which is not affordable & under budget for beginners who want to start their blog or website. So if you are also a beginner & are looking for quality hosting at the cheapest price then you must give it a try to Hostinger.
Hostinger is excellent hosting for beginners with great customer support which are always there for help if you get stuck anywhere. Below are some features of this hosting company
Note: Many hosting Companies available in the market don’t provide you more payment options but with Hostinger you will get lots of payment methods like Paytm, wallets, net banking, debit card, etc.
Features of Hostinger
- 99.9 % uptime
- Provides H-panel
- Cheap price
- Good customer support 24/7
- Free domain with premium plan hosting
- Free SSL(secure socket layer) HTTPS
- Cloudflare
- Litespeed cache for fasting your website speed
- 1-click WordPress install
- 30-day money-back guarantee if you don’t like their hosting
My friend, I hope now you have got an idea about Hostinger hosting & its features, So without wasting your valuable time now let’s jump to the main point of this article & that is how to buy hosting on Hostinger & how to set up your professional blog or website. I am also going to share with you a coupon code which will give you an extra discount.
I have divided the whole process step-by-step so that you can learn it hassle-free.
They have done some little changes in buying hosting & for that, you must watch the below steps carefully.
How to buy hosting from Hostinger in 2022(complete tutorial)
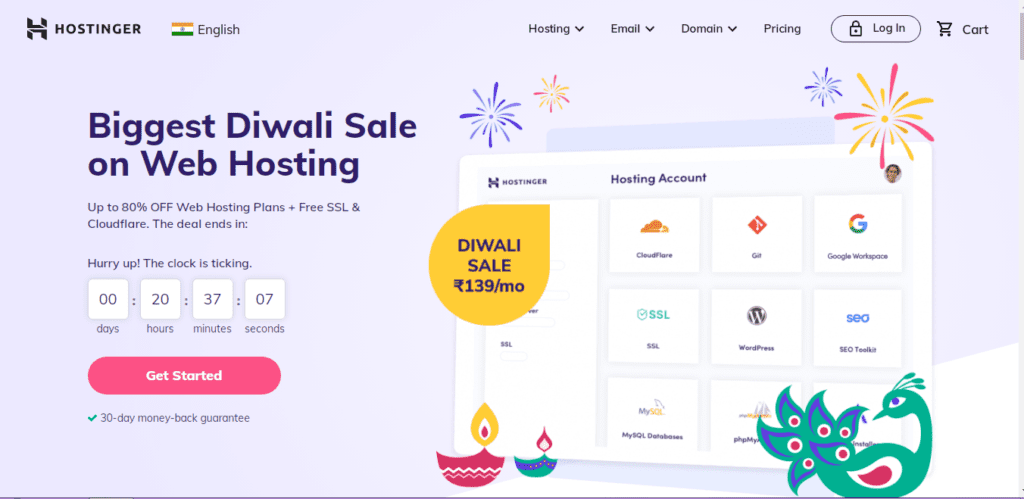
Step1 ) Go to Hostinger.in
Step 2) Select a hosting plan :
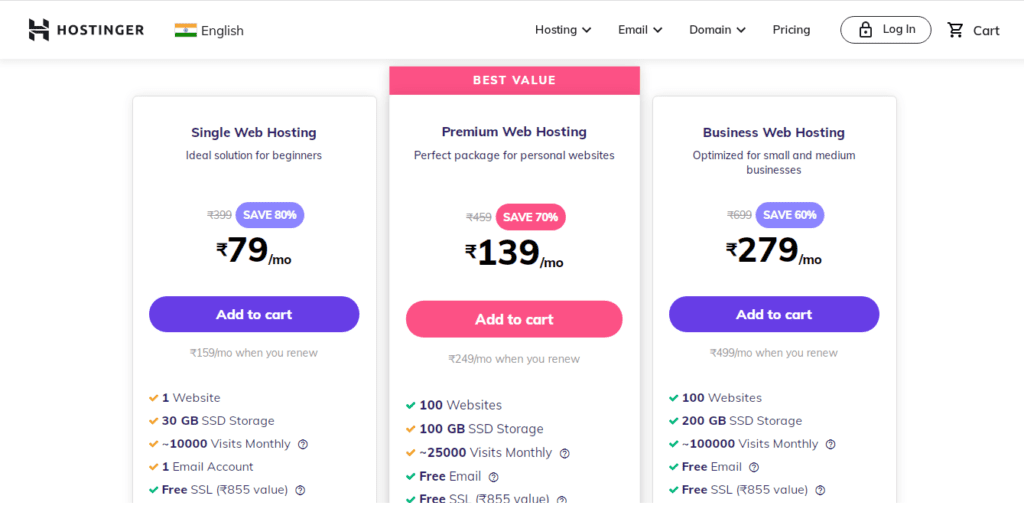
just select a hosting plan which is more suitable for you. If you will select a single web hosting then you can only host a single website & you will not get a free domain name but if you will buy a premium web hosting plan then you can host up to 100 websites on this hosting plan & also you will get a free domain name for 1 year which is according to me is the best option to go with.
Note: In premium web hosting also if you will purchase for 12 months then only you will get a free domain name but if you make a purchase for the 1-month duration then you will not get a free domain name.
Just you need to select a plan as per your requirement.
Step 3) Select your hosting duration:
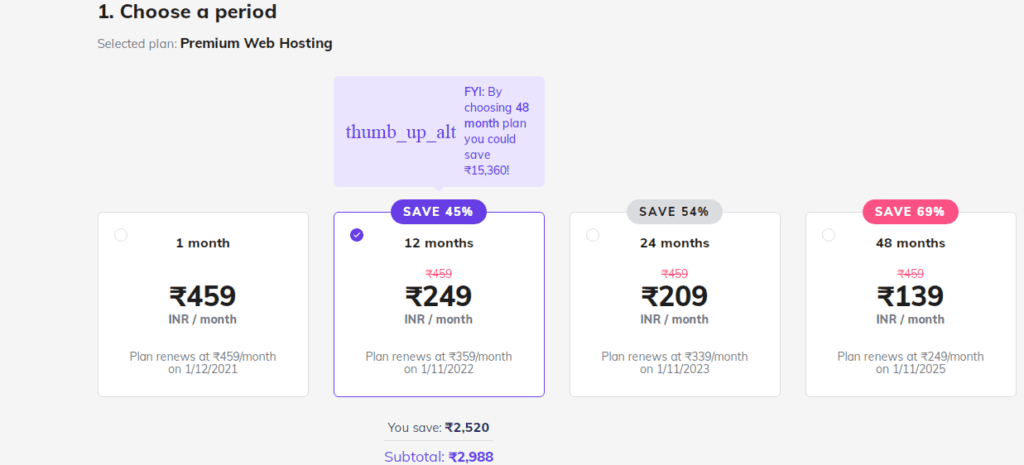
Select the duration for your hosting, which means for how many months you need to buy hosting. The higher duration you select the more discounts you will get.
Step4) create your account:
The next step is to enter your email address, So you need to enter your right & working email address carefully because all the emails from Hostinger will arrive in your email.

Step5) select the payment method :
there are various payments options available in Hostinger which you can use to make payment for your hosting.
Many hosting companies don’t provide you more payment methods & you need to use a credit card to make a payment but with Hostinger you get various payment options like Paytm, UPI, google pay, debit card, net banking, etc.

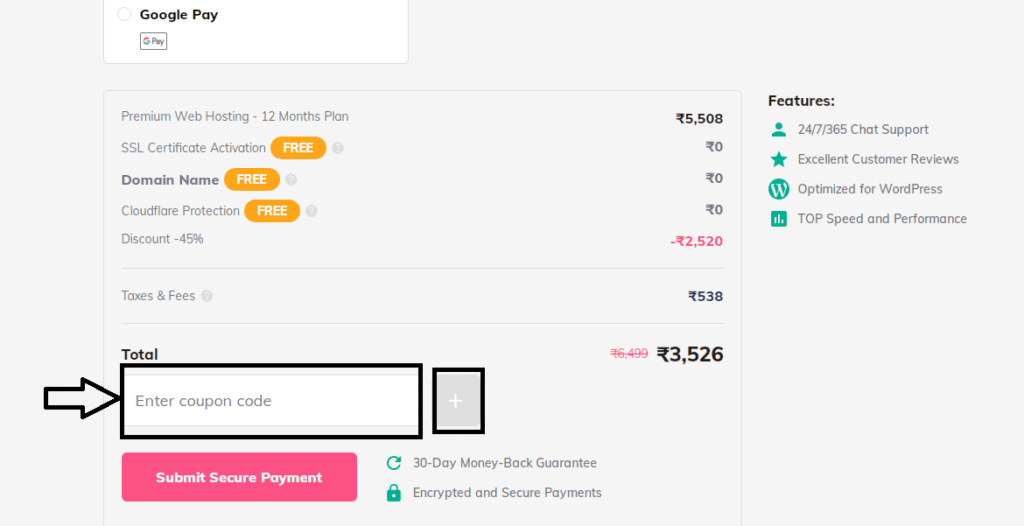
You can select any payment option as per your choice, then just enter coupon code & click on the submit secure payment button.
Hostinger discount coupon code (7% extra discount) –
Many people search for discount coupons and for that I am sharing a coupon code that will give you an extra discount and it is FLASH. just use the FLASH coupon code to get some more discount.
Here are also some more coupon codes: HIT2021, DIWALI2021
Use the coupon code during checkout.
The next step is to fill Your basic details but before that just go to your Gmail, confirm your account & create your password as shown below in the figure.

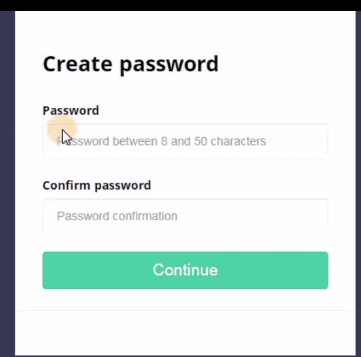
after you will create a password & clicking on continue they will take you to H-panel & after that, you don’t need to do anything on that page & just come back to the payment page where you have left.
Step6) Fill up your basic details:
Now come back to the payment page just fill up your all details carefully & complete your payment.
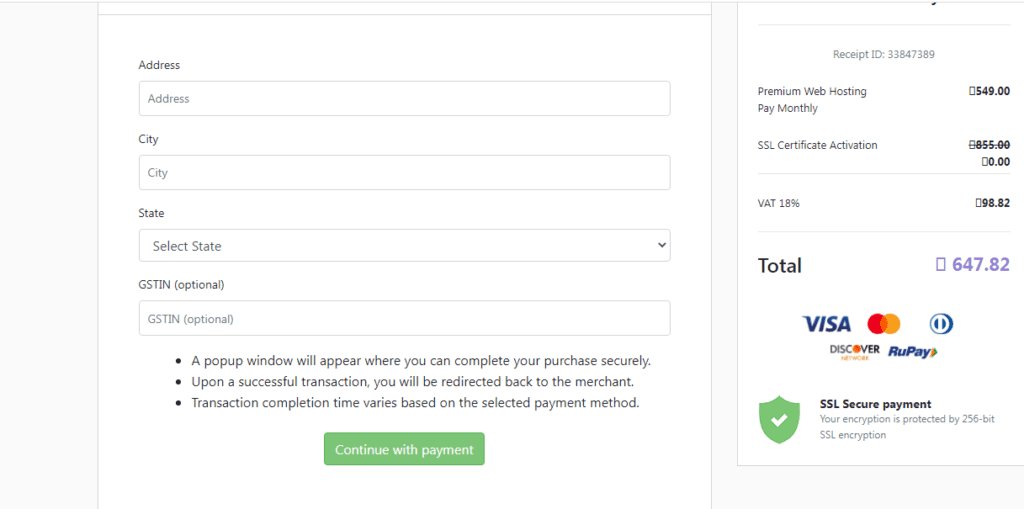
Note: After making a payment you will be redirected to a thank you page or another page as shown below.
Now we have purchased the hosting & the next step is to log in to your h-panel. Just go to Hostinger.in again & log in with your email & password.
You will see a new screen as shown below in figure

What is H-panel
The above is the H-panel through which you can do important settings & guys, do you know that when you purchase any hosting from any company they provide you C-panel that is control panel but in Hostinger there is an H-panel which is very easy-to-use & user friendly.
Through H-panel you can control & can do important settings of your website.
Step7) Setup your domain, hosting, SSL :
Now we need to set up our hosting, domain, free SSL(HTTPS connection) & for that just follow the below-given steps.
Note: If you have purchased premium web hosting for 12 months or higher then only you get a free domain name which you can easily claim in your H-panel
How to claim free domain name on Hostinger
You will find an option to claim a free domain name in your h-panel
You can get any extension that you want either it may be .com .in .me etc, just select a domain name that suits more to your content or business.
I recommend you to go with the .com domain extension
After that, you need to set up your domain name & it is a quite an easy process. Click on the setup button that you will find besides your domain name as shown below
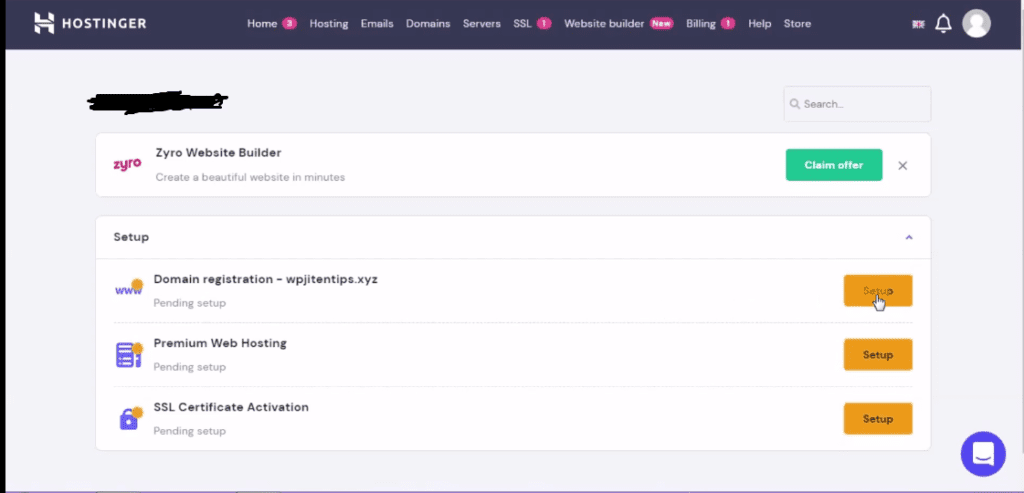
The next step is to fill up more your details like address, email, etc & then click on continue to complete your domain setup.
You need to also go to your E-mail & verify the mail that has arrived from Hostinger & then the process will be completed as shown below in the figure
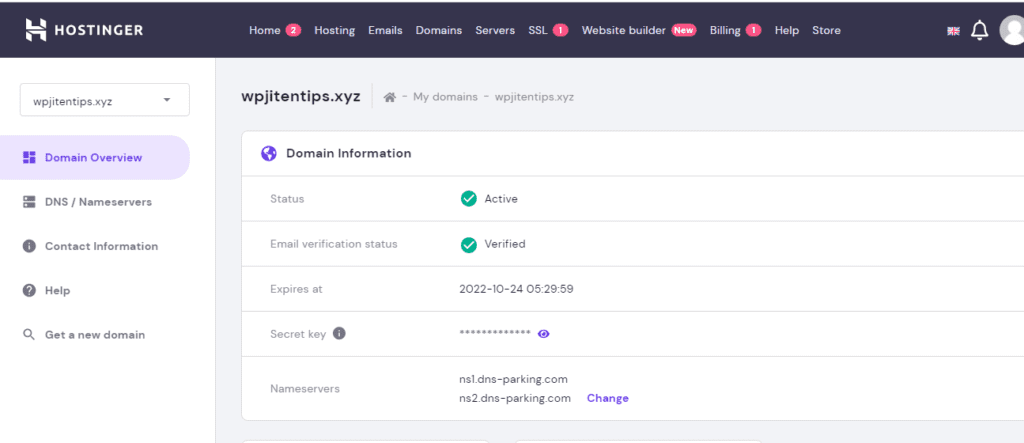
How to Install WordPress on Hostinger
WordPress is one of the best free software available in the market through which you can fully customize your blog or website without writing a single line of code & it is a quite simple process to install WordPress on Hostinger just Follow the below-given steps.
There are two ways to install WordPress software in Hostinger & for that just carefully look at the below-given steps
To install WordPress software we need to first set up our hosting & you will find that option under h-panel only.
After setting up your domain name come back to your h-panel again & that you can do by navigating the home section at the top left corner as shown below

Now just click on the setup button which is just beside the hosting option.

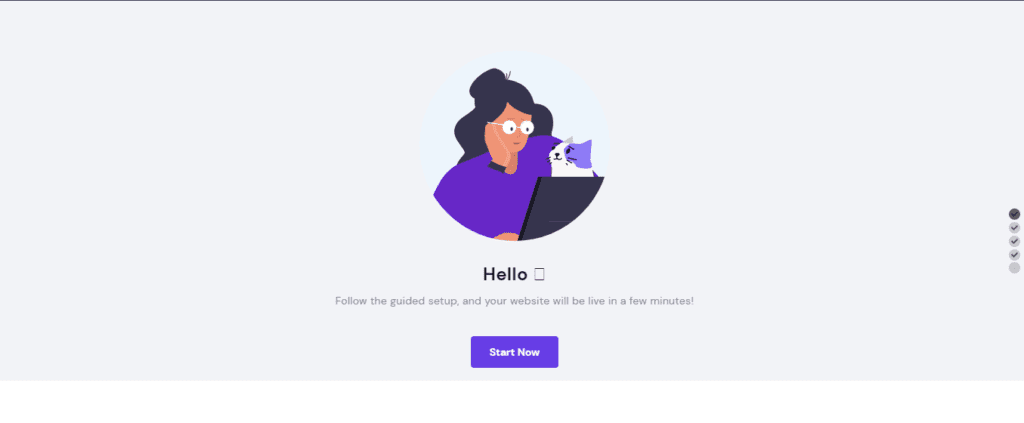
After that, a new page will be open as shown below in the figure & you need to just click on start now button
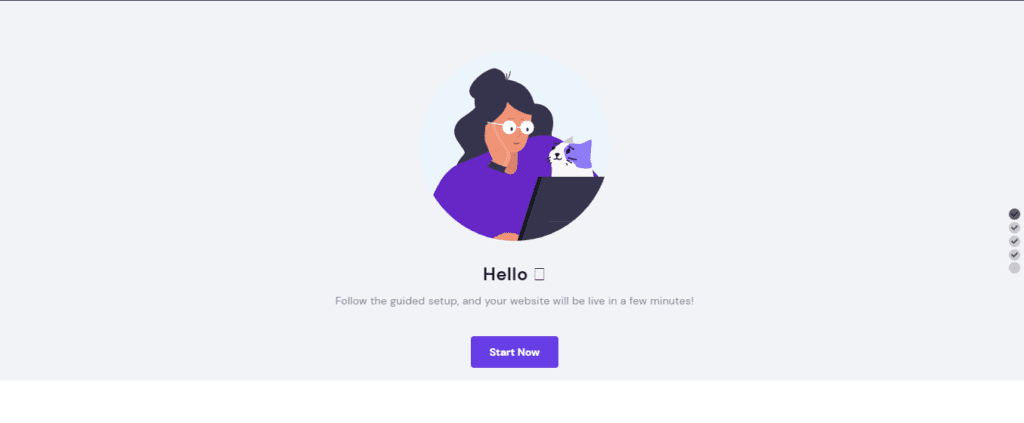
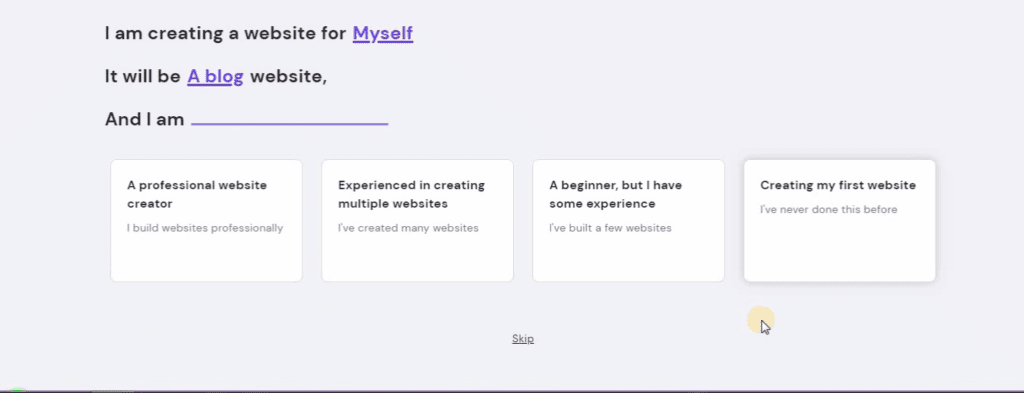
You will be asked some questions that you can give or can skip it.

Type of website you want to create
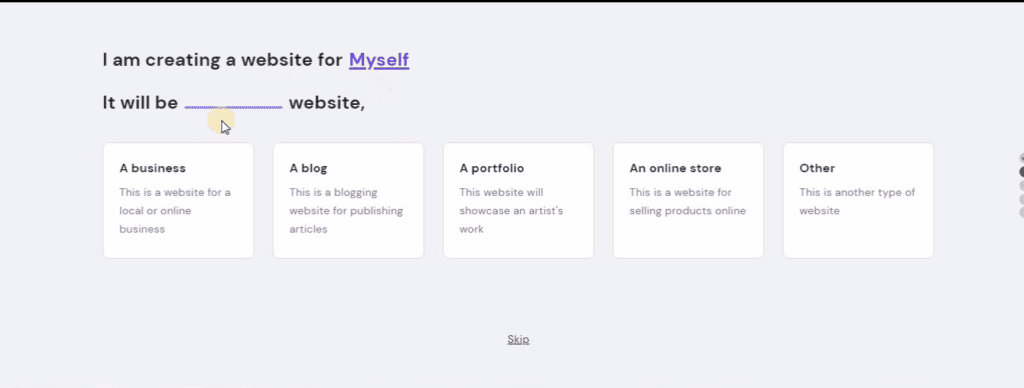
select your expertize
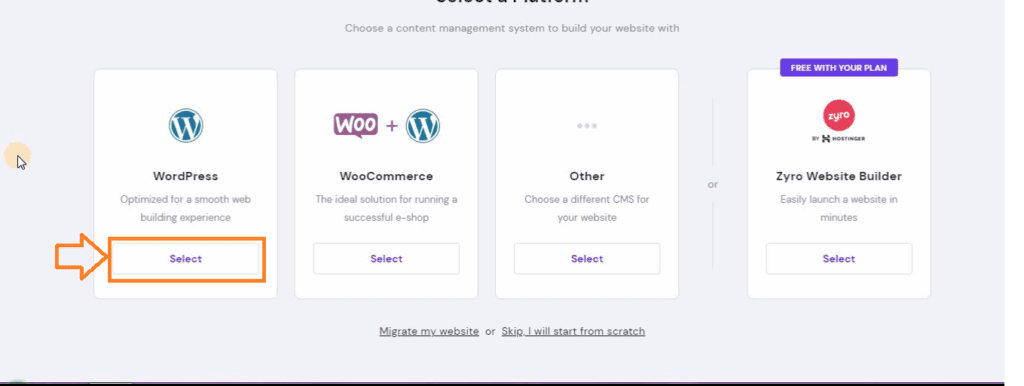
Finally, there will be an option to install WordPress as shown below. Now you can install WordPress directly from here or another way is by just clicking on skip I will start from scratch & then you will be redirected to another page in that you will find an auto-installer option & from there also you can also install WordPress easily.
So for now we are going to install WordPress directly as shown in the figure, you just need to click on the select option.
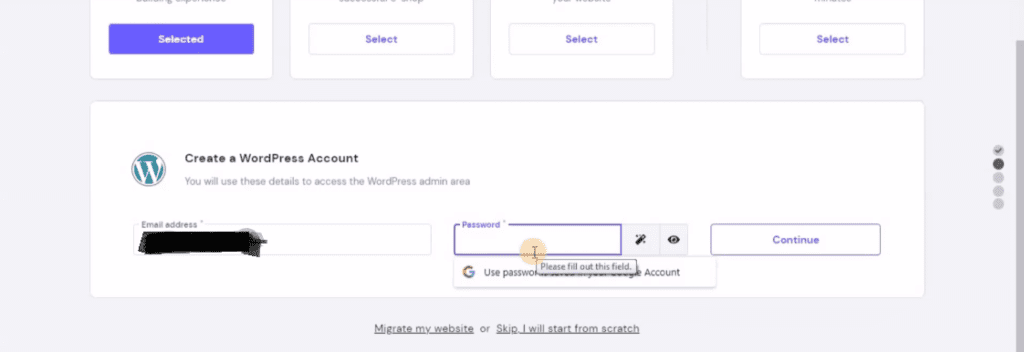
The next step is to create a WordPress account just Enter your Email & create a password.
after creating an account there will be one more option & that is to select a template that you can select according to you or can even skip that step.
In the left box just select your domain & then you are ready to go.

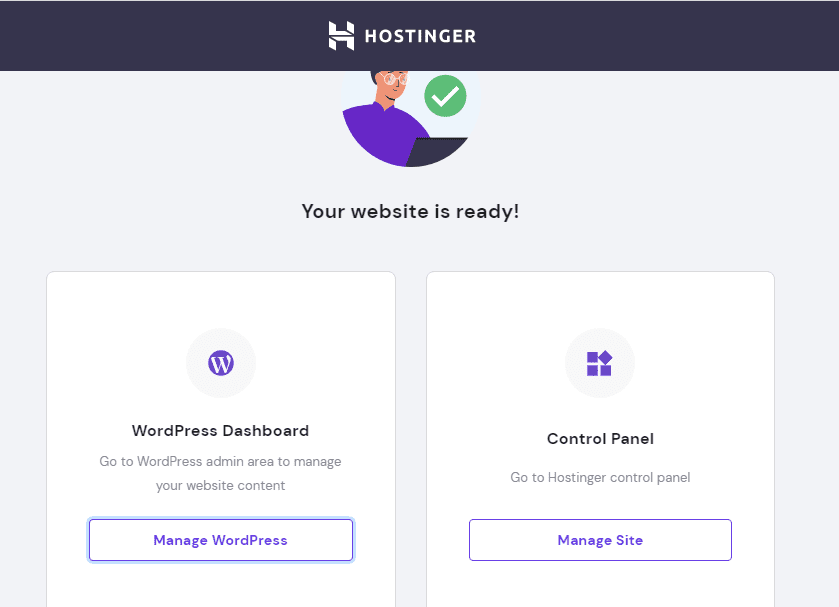
Step 8) login to WordPress dashboard
login process for all WordPress website is same & for that, you just need to go to your browser & enter your website name & at the end add /wp-admin
For Example : yourwebsite.com/wp-admin
After that, you need to enter your WordPress username, password & you will be on your WordPress dashboard.
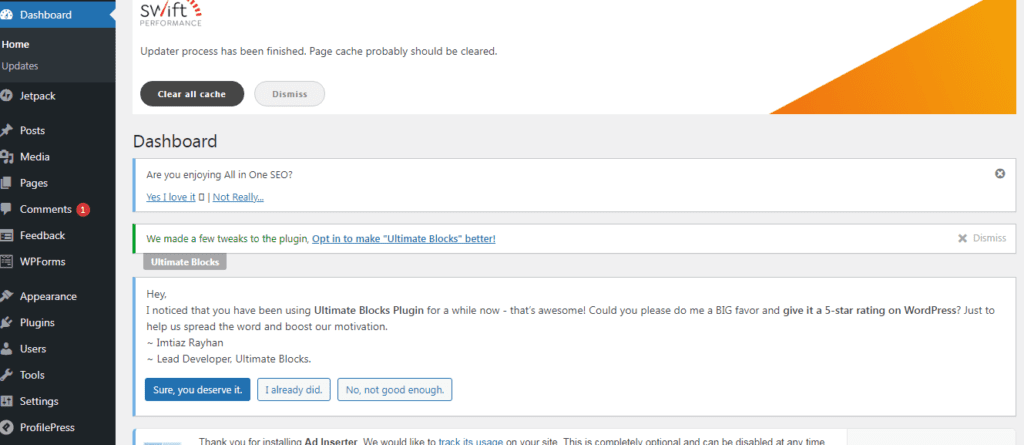
Now if you don’t know how to use WordPress then I have created a complete practical 4+ hours English WordPress course that will help you to learn WordPress from basic to advanced level & if you want this course then you need to just buy hosting from my affiliate link & send the receipt to me at Email: [email protected]
Also, I will give you one more bonus from my side, want to know about it click here
After sending the receipt you will get my free 4+hours Practical WordPress video course. Now let’s move to the next point of this article & that is how to activate a free SSL certificate on Hostinger
How to activate free ssl certificate in hostinger
SSL(secure socket layer) is very important for your website & Google also loves websites that start with a secure connection.
Hostinger gives you a free SSL that you can easily activate on your website & for that just follow given below steps
- Go to H-panel & click on setup option just besides ssl certificate activation as shown below in figure
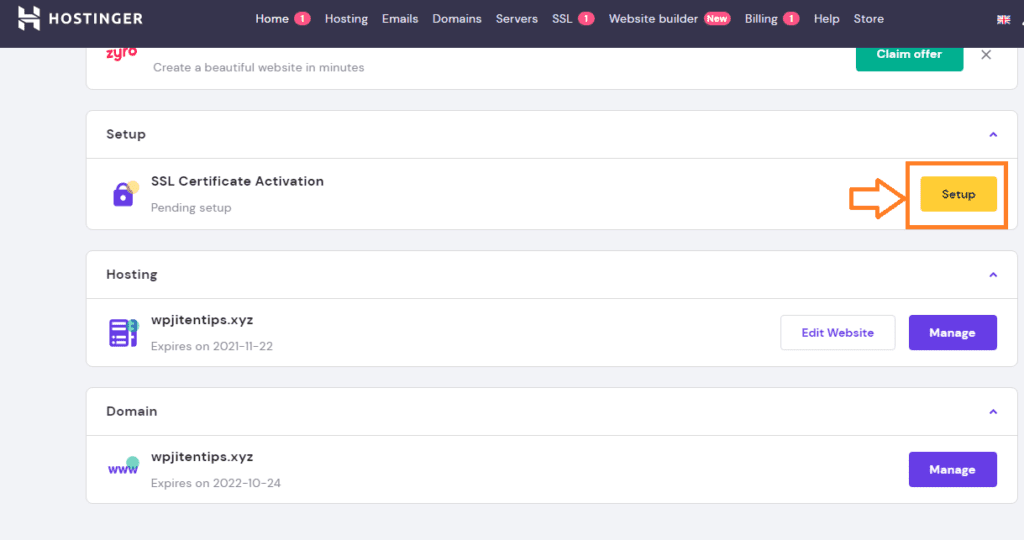
2) After that an option will come in which you just need to click on activate & then your SSL certificate will activate automatically.
So this way you can easily activate a free SSL certificate on Hostinger.
You can also watch my full practical Hindi video on how to buy hosting on Hostinger step-by-step
Up To You: I have shown you all the steps on how to buy quality hosting at the cheapest price & set up your professional blog & now it is up to you, if you are really serious about blogging then you must start a professional blog & if you don’t have any investment then create a free blog
I hope guys, This blog post has helped you to learn step-by-step on how to buy hosting from Hostinger in 2022 & how to install WordPress easily. If you have any queries or questions regarding this blog post then you can ask me in the comment box.
You can also follow me on Instagram
NOTE: This blog post contain some affiliate links, means if you buy any product or service through this links then i will receive a small commission at no extra cost to you. which help us to maintain this website. remember that i will always share products or services that i have personally used & which will be helpful to you.
