How To Add Custom Domain To Blogger In 6 Simple Steps
Hey, are you looking for how to connect a domain with blogger Blogspot then you have landed on the right page. In this blog post, I will share with you the complete process on how to add custom domain to blogger blog step-by-step
Friends, blogger is a free blogging platform that provides us free hosting & a sub-domain to create a free blog but with a sub-domain, it looks unprofessional, so blogger also provides us an option to add 3 party custom domain names & according to me it is a nice feature of blogger.com
With a free subdomain, your blog will look like name.blogspot.com & its looks very unprofessional, isn’t it?? So why not to buy your own domain name and connect it with blogger.
After connecting your domain with blogger it will look like example.com instead of example.blogspot.com and it looks very professional & will help you to build a personal brand.
Just for example you can consider my blog jitenbloggingtips.com it looks very professional & it has also helped me to create a personal brand.
If you don’t know much about blogging & are a beginner then you can read my complete guide on how to create a free blog on blogger step-by-step
How to add custom domain to blogger
If you have purchased the domain from any domain provider the process for connecting the domain is almost the same just you need to add 2Cname & 4A record under DNS settings from where you have purchased the domain name.
In this tutorial, we are going to connect domain that we have purchased from Namecheap & GoDaddy.
If you are looking for a domain name at a cheap price then you can go with NameCheap. Namecheap is a very popular website for domain register & the good thing about Namecheap is that its renewal price is not so high & along with this they give us free domain privacy means your personal information is hidden on whois & you will not receive any fake call and messages by anyone.
Helpful guide- how to buy domain from namecheap.
Now here I am assuming that you have created your free Blogspot blog on blogger & also have purchased a domain name. So without wasting your valuable time let’s drive to our main topic that is how to connect domain with blogger blog.
Want to buy a domain name at a cheap price just click here
If you want to buy a domain from hostinger.in, as it provides various payments option like Paytm, debit card, etc. then you can click here
how to connect custom domain on blogger with namecheap
Step1) Go to blogger.com

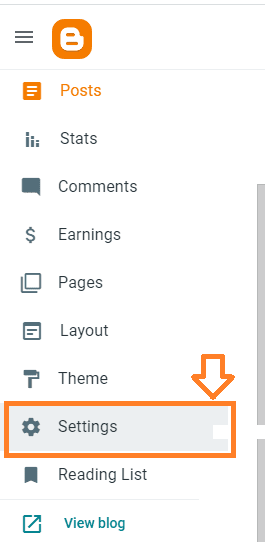
Step2) Select a blog to which you want to connect & click on the setting in the left section of the blogger dashboard as shown below.
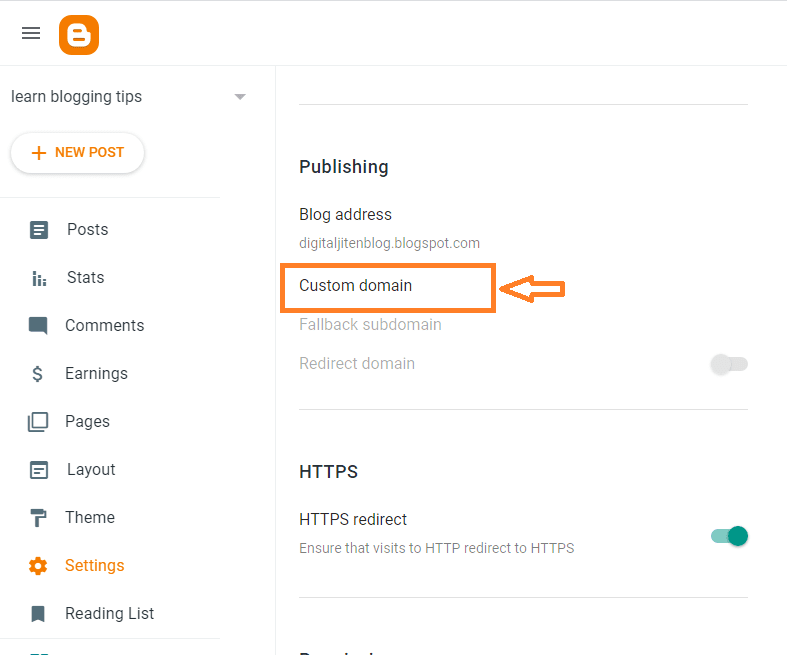
Step3) just scroll down & head over to the custom domain option & just click on it as shown below.
Step4) enter a domain name & don’t forget to include www at the beginning of your domain. Just enter your domain name for example www.yourdomain.com or whichever domain you have purchased from Namecheap it may be .com, .in, .co.in, etc.
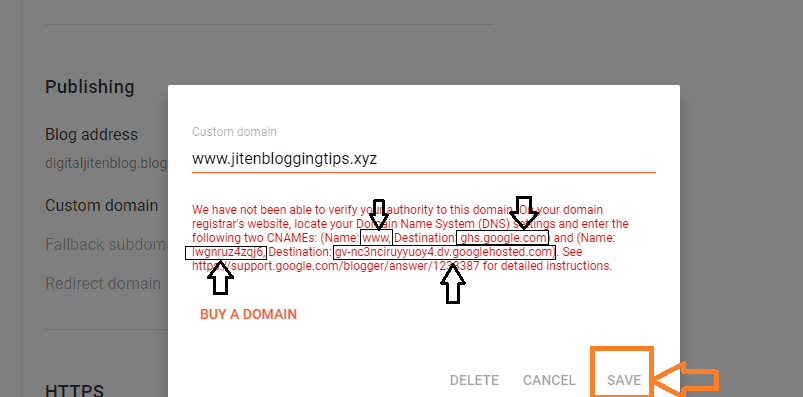
when you will click on save an error will come as shown below.
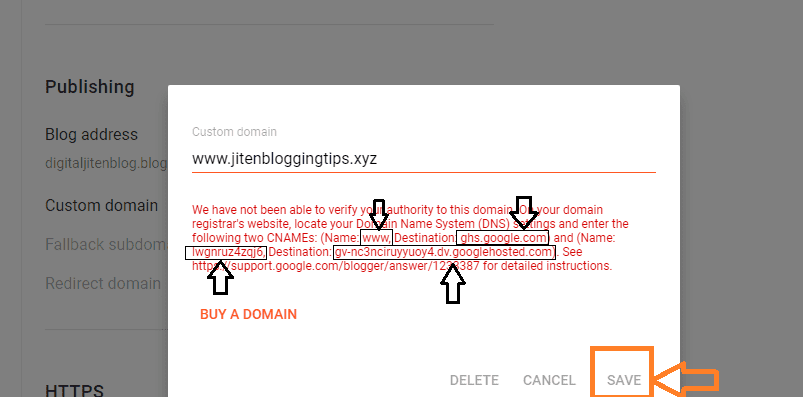
Step5) now you need to just copy that 2 C-name as shown above & have to paste them in Namecheap DNS settings. For that first log in to Namecheap.
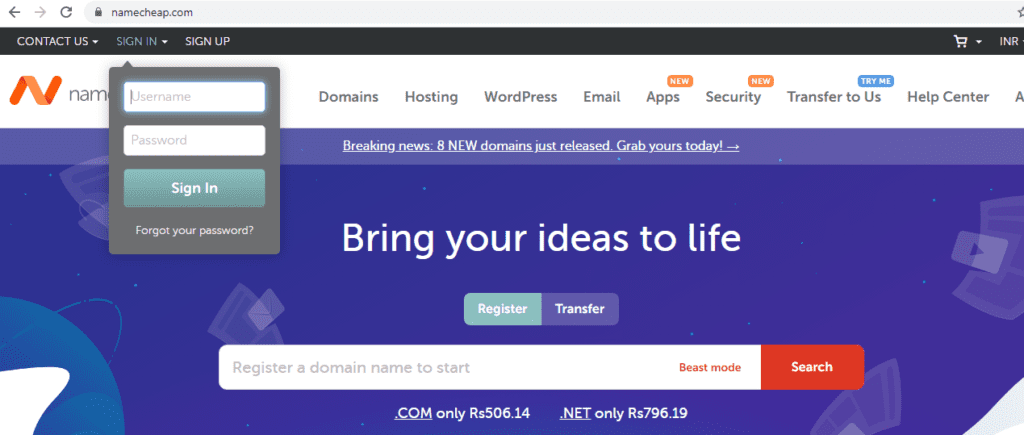
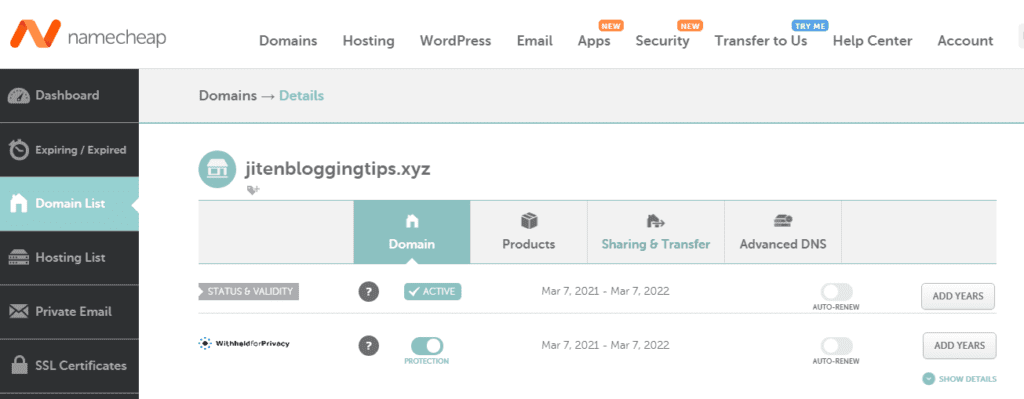
now the Namecheap dashboard will open there you will see your domain name which you have purchased & you need to just click on manage.

after that, you just need to click on advance DNS as shown below
when you will click on advance DNS you will see that there is already a Cname & first you need to edit that in Host let it be www & in value copy, the destination from blogger & you have to paste it in value.
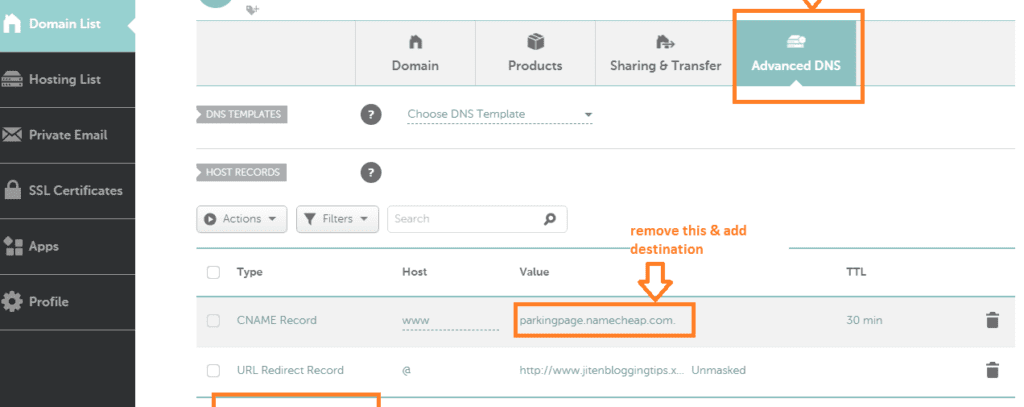
just remove the default value & add a new value & click on the tick as shown below.

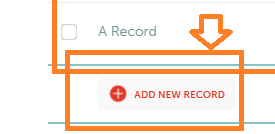
now we need to add another C-name for that just click on add new record.
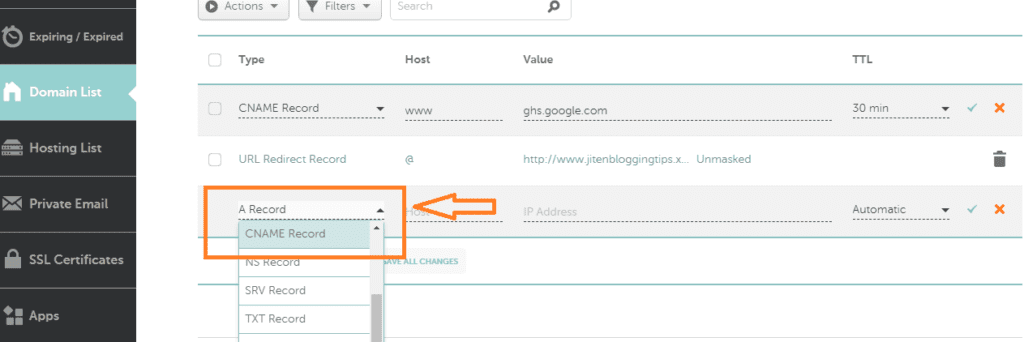
now select c-name & just paste host & value from blogger as shown below

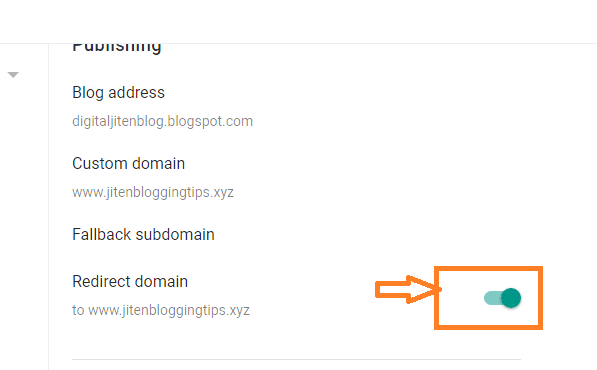
Step6) come back to blogger & just click on save & also enable the redirection option as shown below.
Now just check if your blog is working or not by typing your domain name on google.
now still if your blog is not opening then you need to add 4record in advance DNS setting only of Namecheap.
To add a 4A record just follow the below-given instructions.
Namcheap>dashboard>advance dns>click on add new record & select A record.

Now you need to enter @on host section & i.p address on destination. Like this add all 4 a record one by one & don’t forget to save all records.

Add this 4A record
216.239.32.21
216.239.34.21
216.239.36.21
216.239.38.21
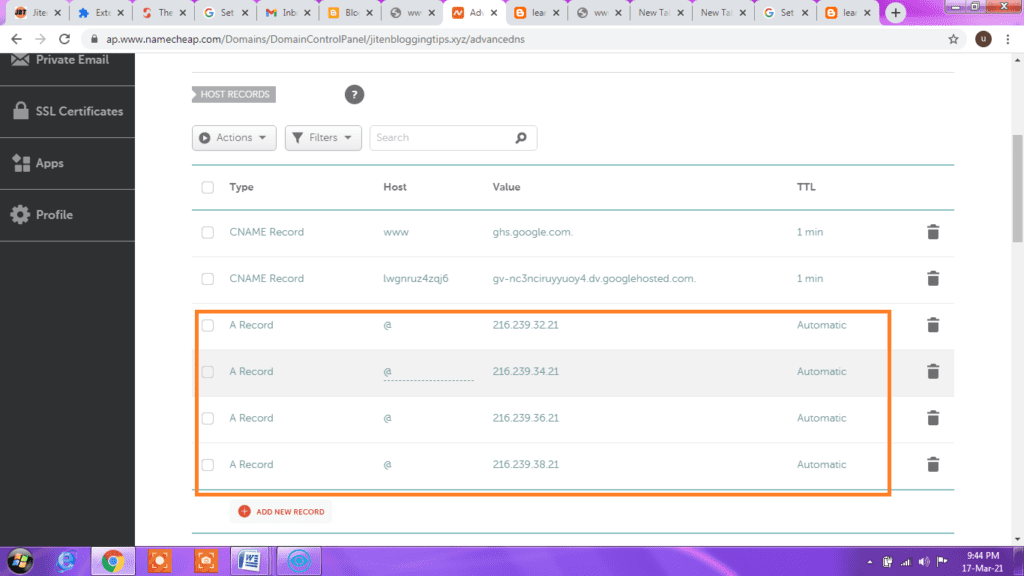
After adding all 4A records shown above now just go to google & again type your blog address and you will see that the blog will start working & if it is not opening then wait for some time as it may take some time time to connect the domain & hosting.
If you have purchased the domain name from GoDaddy & want to add it with blogger then follow the below-given steps
how to add custom domain on blogger with godaddy.
step1) Go to blogger>settings>custom domain>enter your domain name with www version as we have discussed above.
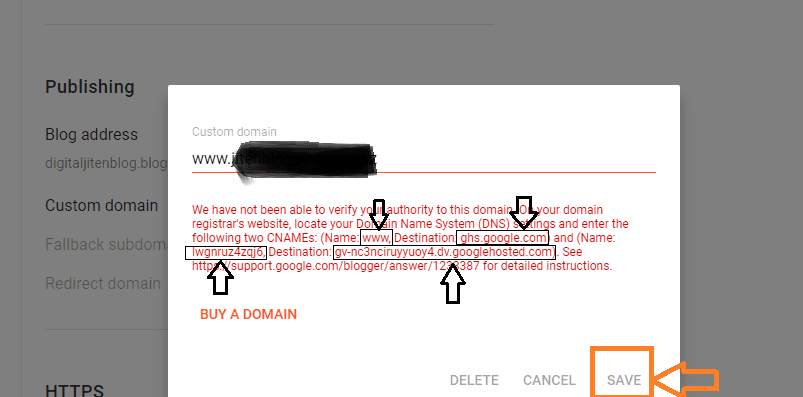
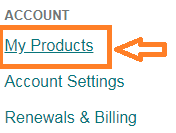
Go to godaddy>login>click on my products
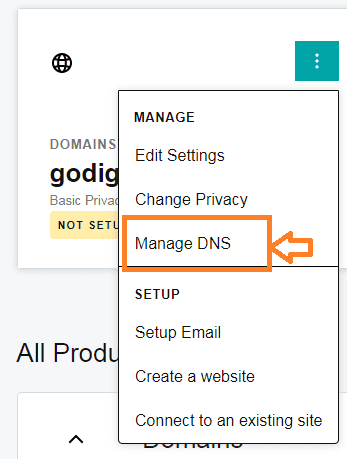
click on manage DNS
after that, you need to add 1cname

then add 2 cname
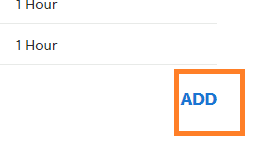
in the host you need to add name & point to you need to add destination & just click on save
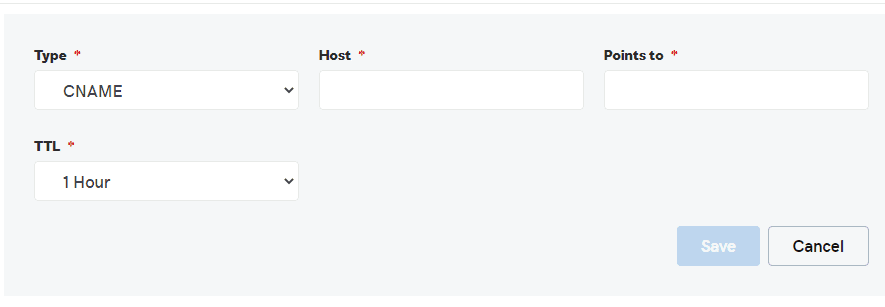
after that, you need to add 4A records.
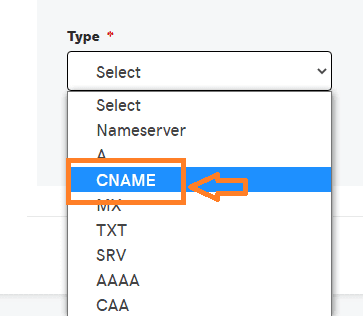
from there select type A as shown below & one by one add all 4A Records.

don’t forget to click on save.
this way you can easily add 2Cname & 4A records and can connect your domain with blogger.
Now let’s see what are some benefits of having your own domain name.
Benefits of adding domain name to blogger
- You can build your personal brand
- Adding own domain looks very professional
- It will become easy to get adsense approval fast
- You can easily earn from your blog.
- People can remember your blog name easily.
- It helps in improving your ranking on google
- You can have your own custom domain email instead of like gmail.com or yahoo.com
I hope you have come to know about how to add a custom domain to blogger blog easily. if you think this blog post is helpful then please also share it with others.



Thanks for sharing. I read many of your blog posts, cool, your blog is very good.